QC Review
As discussed in the introduction, ghqc utilizes a 3 phase approach. On this page we will work through the second phase,
Review, and notify our first file change. The review phase can go back and forth between the reviewer and author as many times as needed
until the file is ready for approval. In this example, we will walk through one iteration loop.
QCer Review
Section titled “QCer Review”In a typical workflow, the reviewer will check the repository out to the provided branch and commit provided in the Issue Body to review the scripts.
Comments can then be added directly to the GitHub Issue to communicate with the Author.

Author Response
Section titled “Author Response”An author now needs to address the comment(s) made by the QCer. We will make the necessary changes to the files and commit.
After the edits are pushed, we can notify the QCer and include the difference in the file changes using ghqc Notify app.
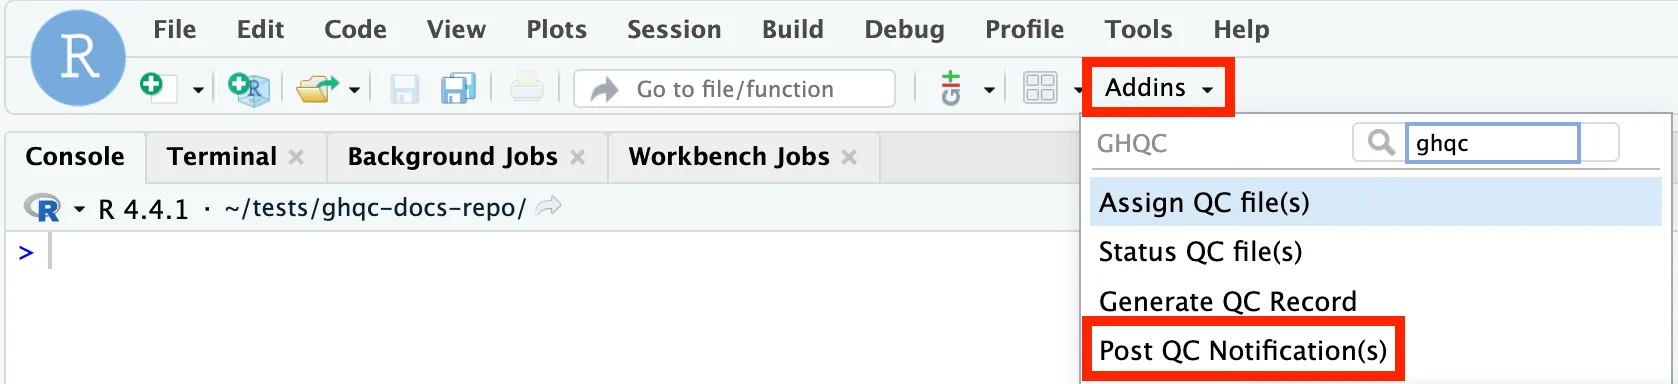
1. Launch the Notify App
Section titled “1. Launch the Notify App”We will launch the app in one of two ways:
library(ghqc)ghqc_notify_app()Using the Addins dropdown in the RStudio navigation bar, search for ghqc, then select “Post QC Notification(s)”.
The app will then launch in your viewer panel.
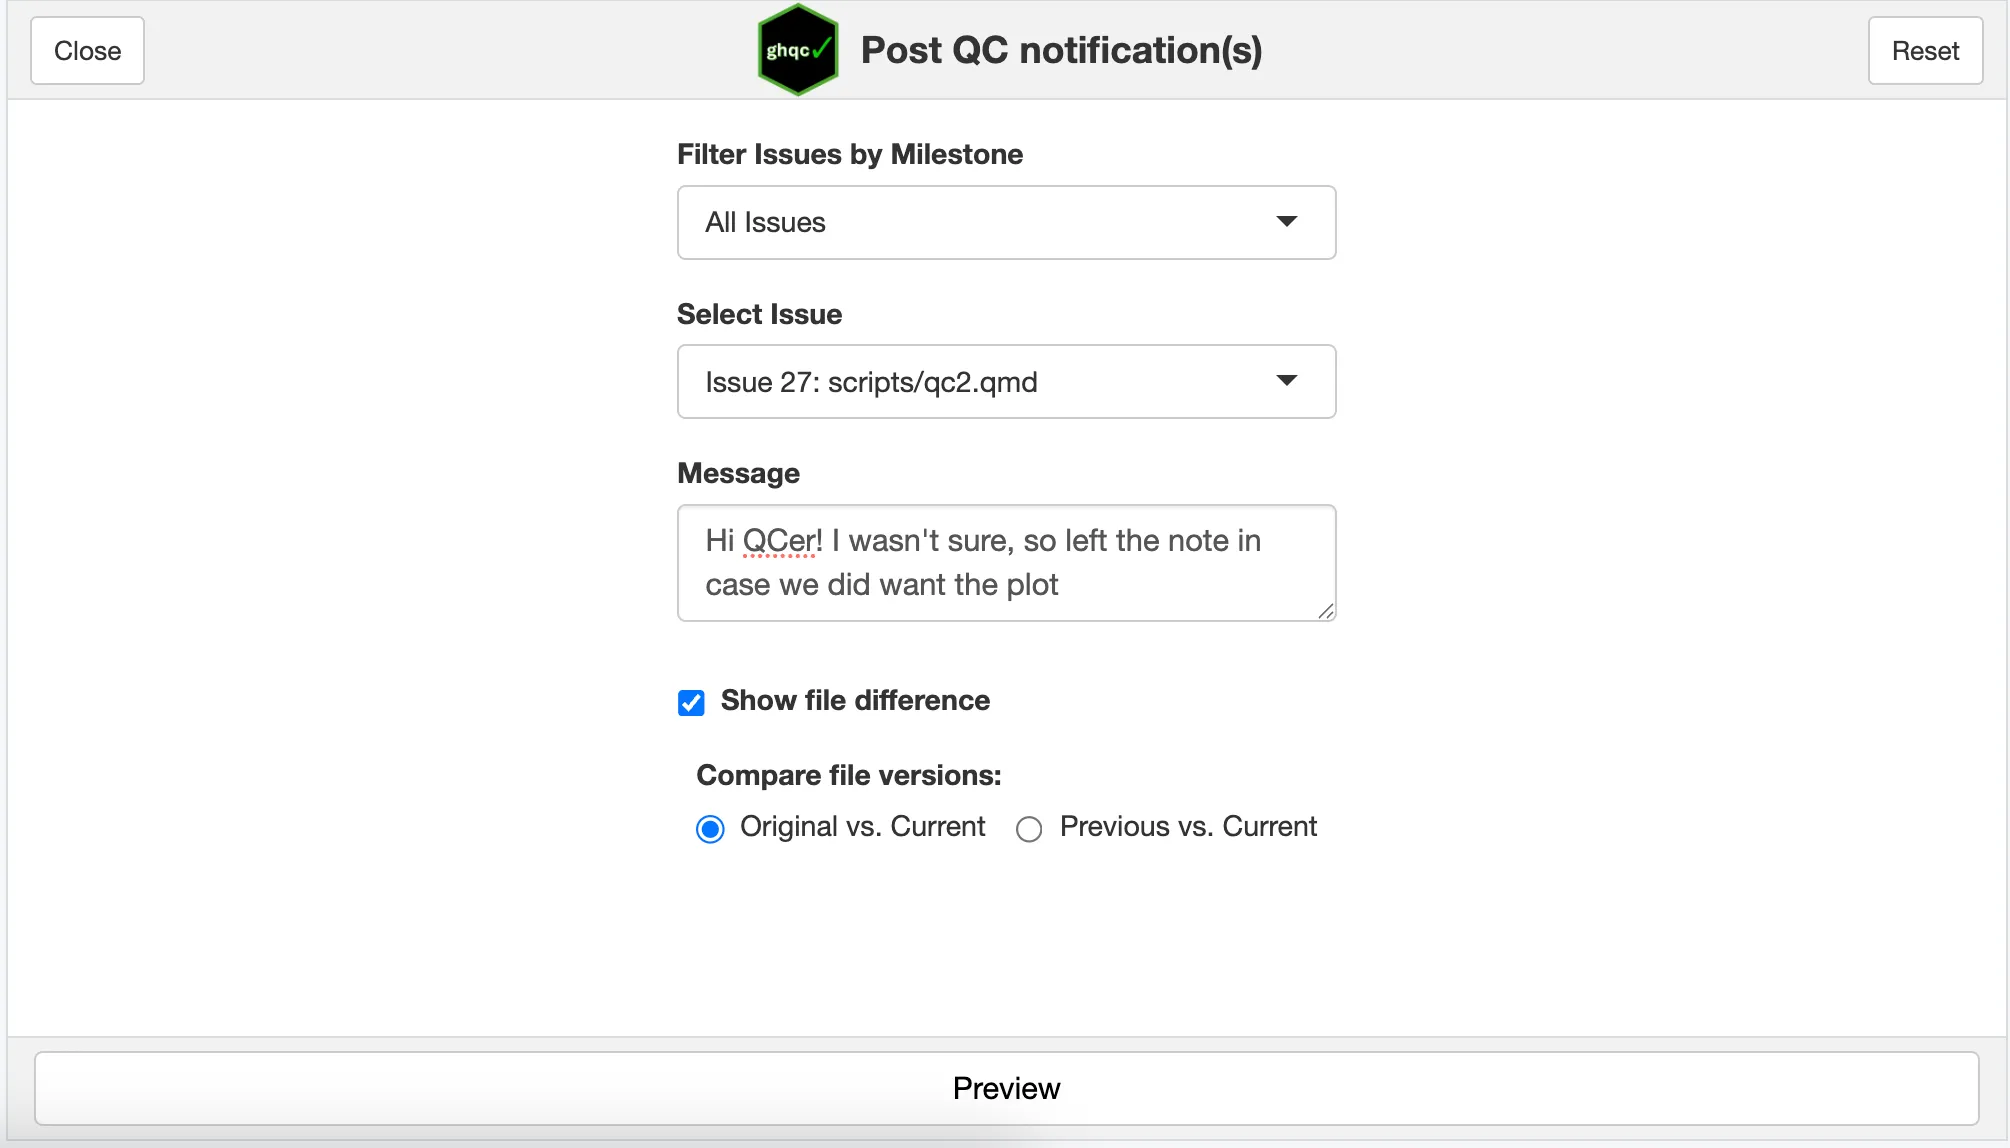
2. Configure QC Notification
Section titled “2. Configure QC Notification”The notify app allows you to:
- Filter by Milestone - By default, all Issues are listed in the Select Issue dropdown. Over the course of projects, it may be beneficial to filter relevant Milestone Issues
- Select Issue - Select the issue to notify the reviewer updates
- Message - Optionally, include a message to provide additional context
- Show file difference - If the file is a text based file, generate a git style difference within the Issue comment.
- Compare file versions
- Original vs. Current - By default, ghqc will compare the commit last commented in the Issue thread to the current commit.
- Previous vs. Current - Allows users to select specific commits to compare.
3. Preview QC Notification
Section titled “3. Preview QC Notification”Once the app is configured how you’d like, selecting the proper issue and commits, ghqc allows you to preview to the comment before it is posted.
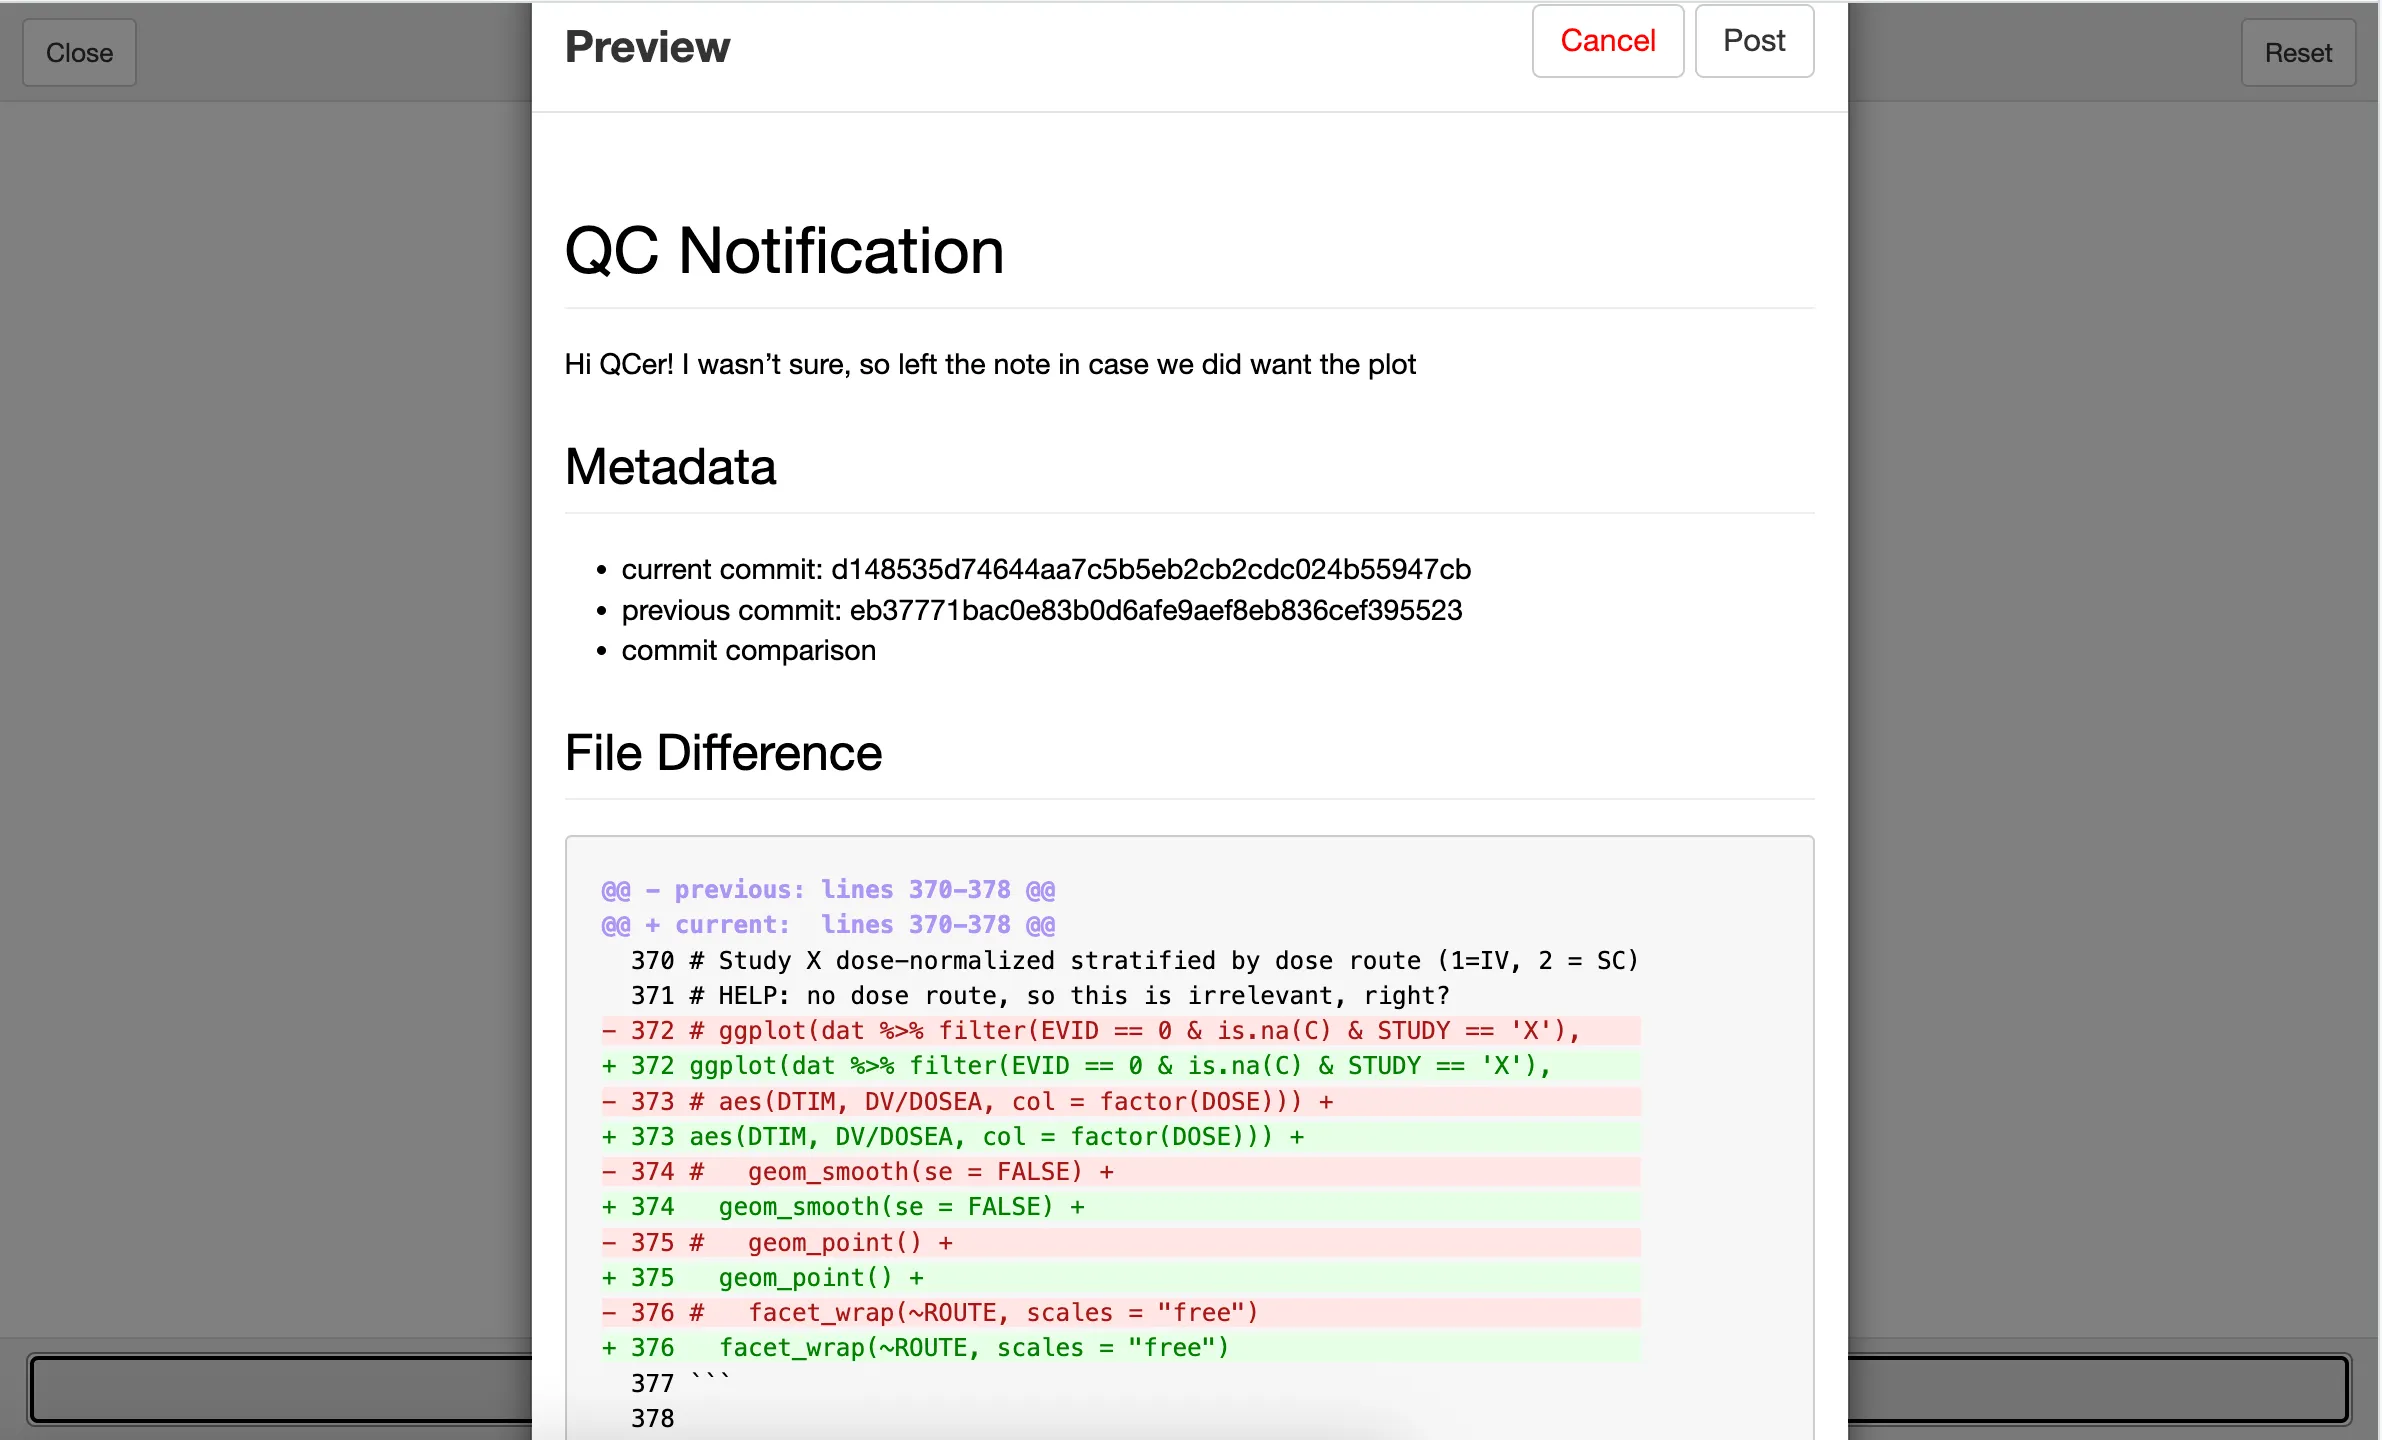
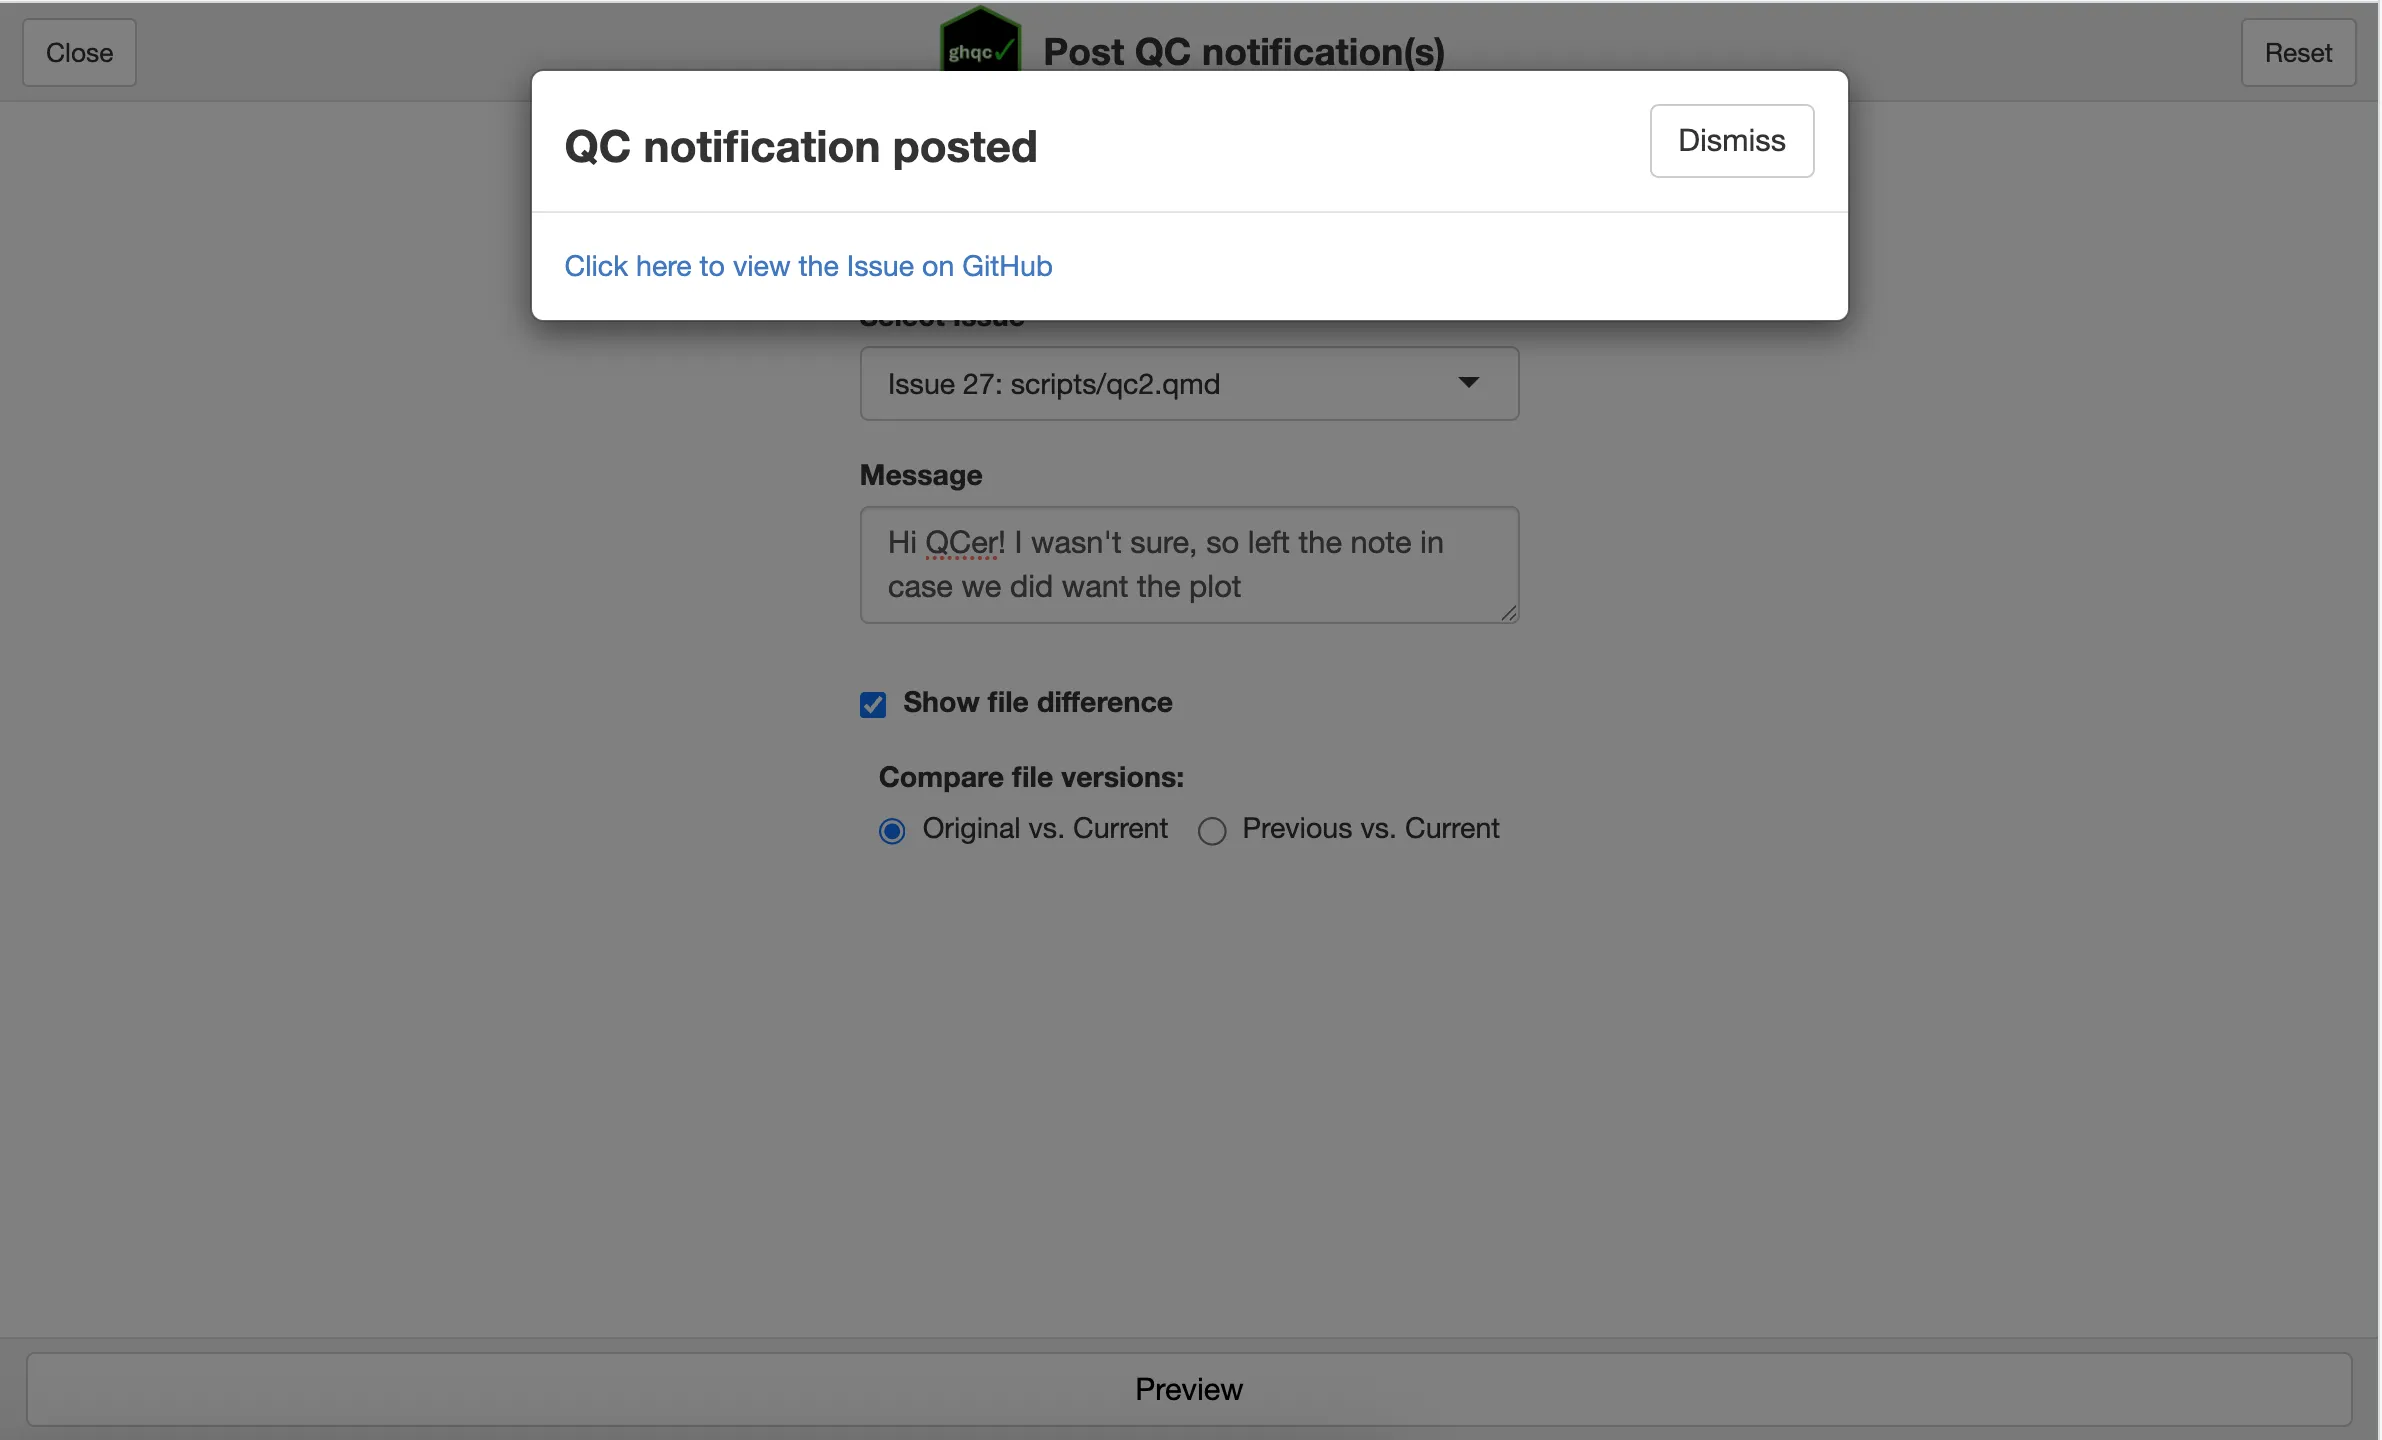
4. Post QC Notification
Section titled “4. Post QC Notification”If you are happy with the content of the notification, click the Post button in the top right. Similarly to creating a QC Issue, a success message will appear with a link to view the newly posted comment.
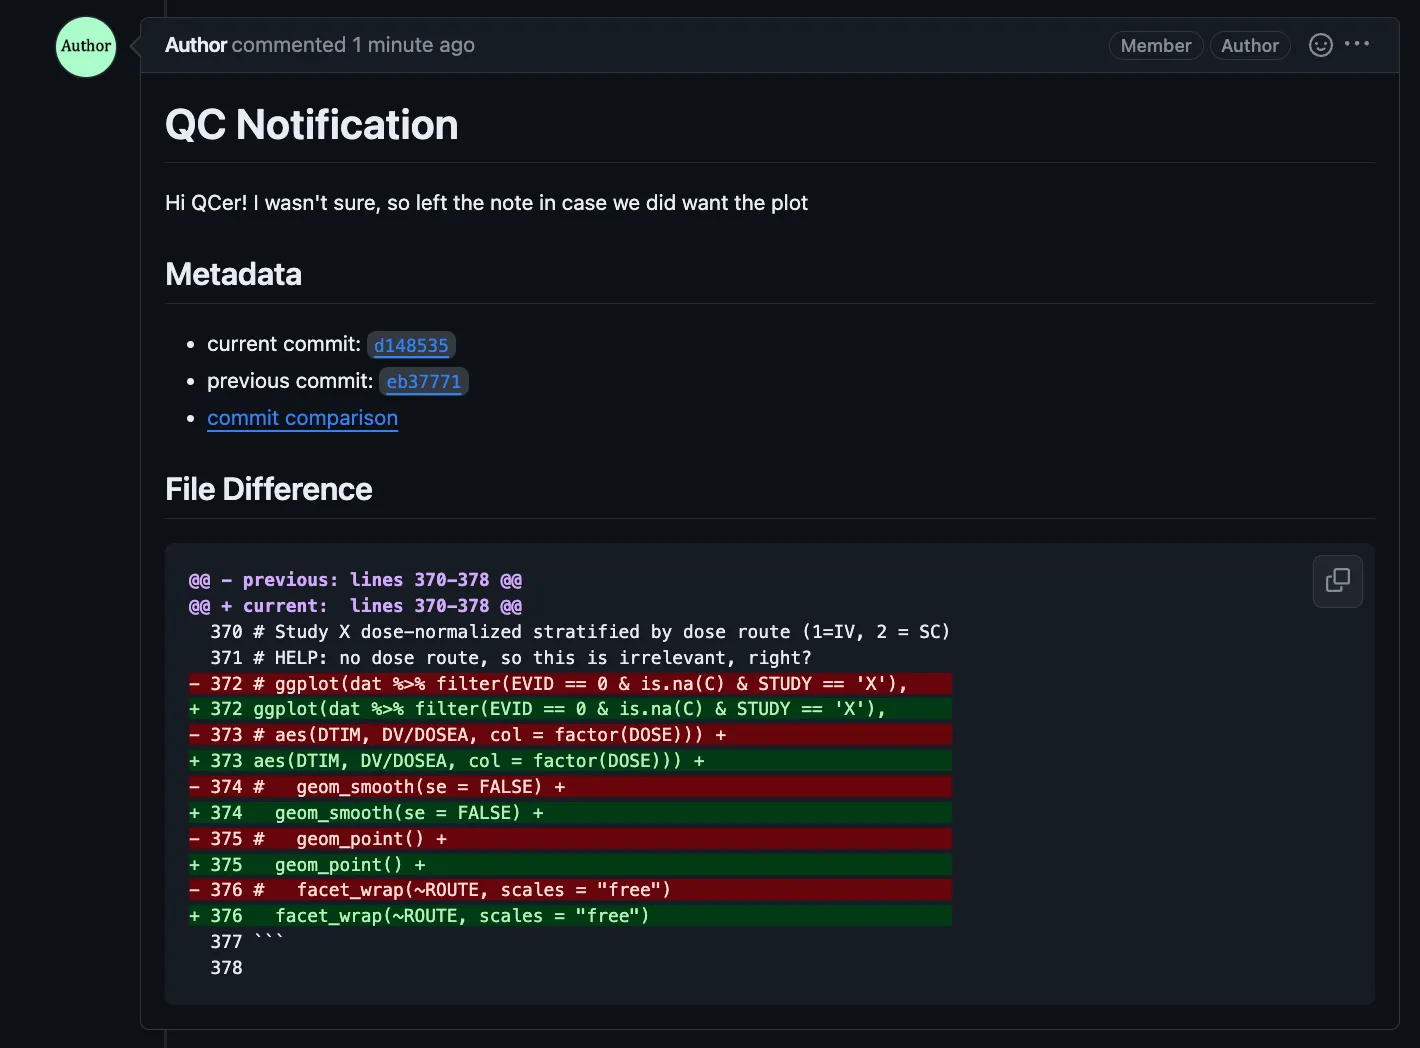
5. QC Notification Body
Section titled “5. QC Notification Body”The QC notification should look the same as it did in the preview, containing metadata of what commits the diff was taken between and a link to the GitHub commit difference for greater context.