Archive Files
At any point in the QC process, you can create a comprehensive archive that includes files from the QC process as well as any other relevant project files.
1. Launch the Archive App
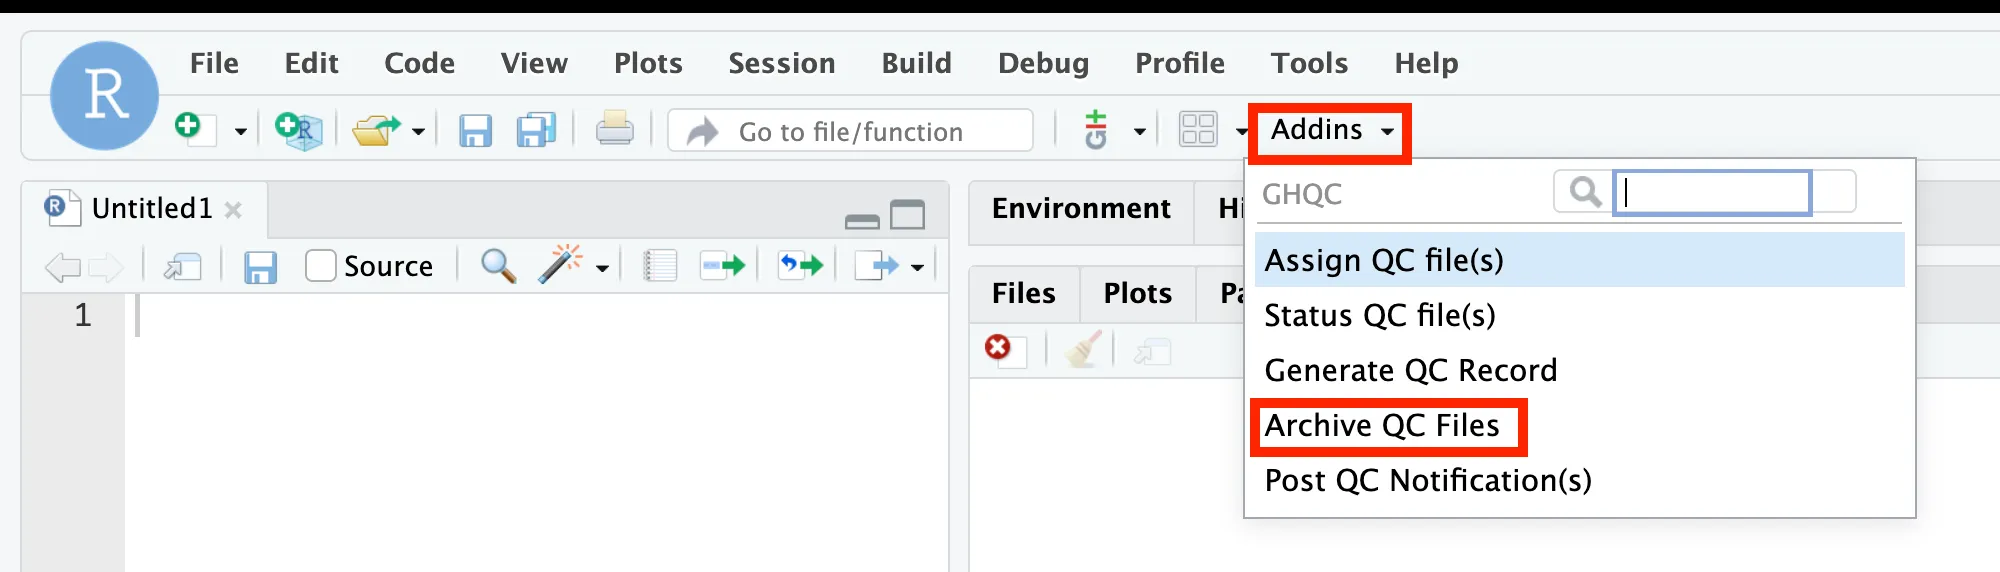
Section titled “1. Launch the Archive App”library(ghqc)ghqc_archive_app()In RStudio, click the Addins dropdown in the navigation bar, search for ghqc, then select “Archive QC Files”.
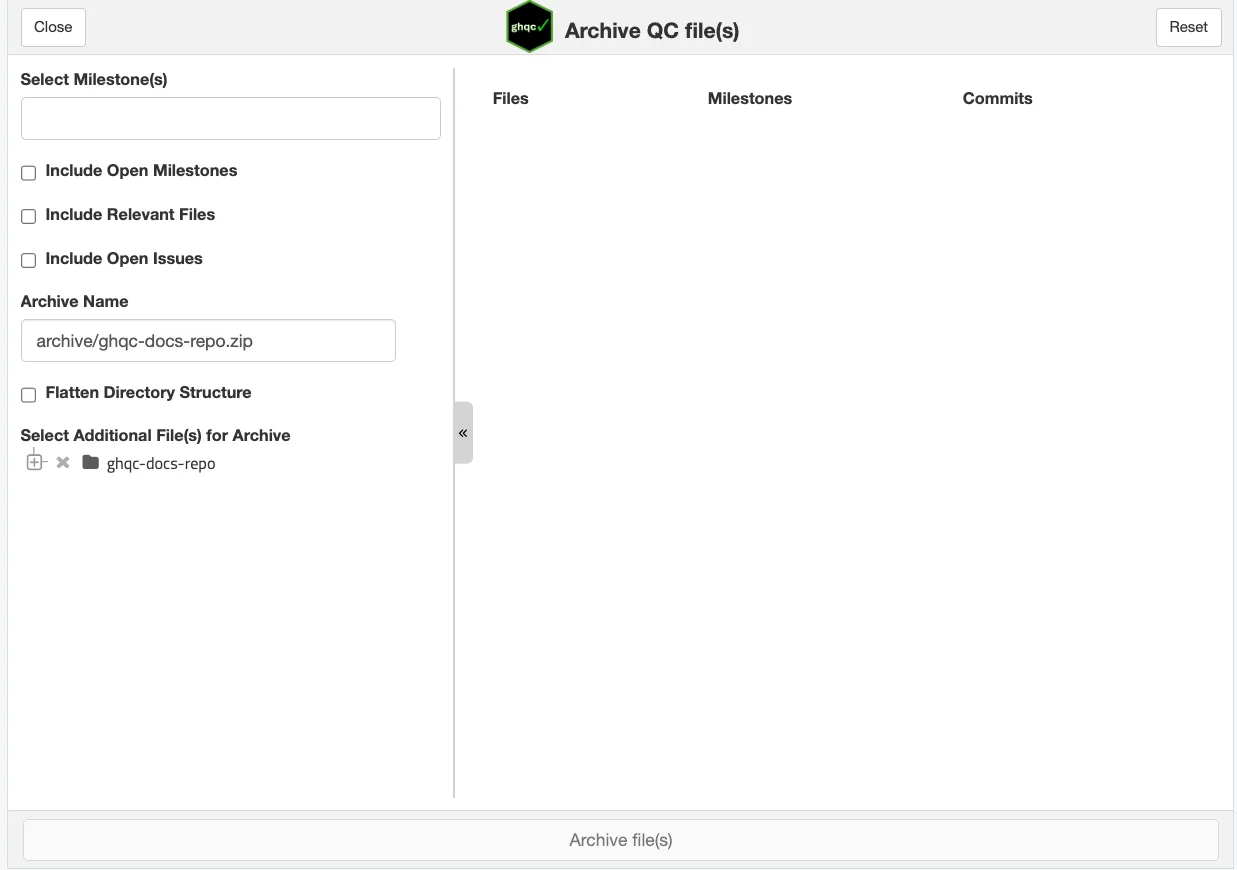
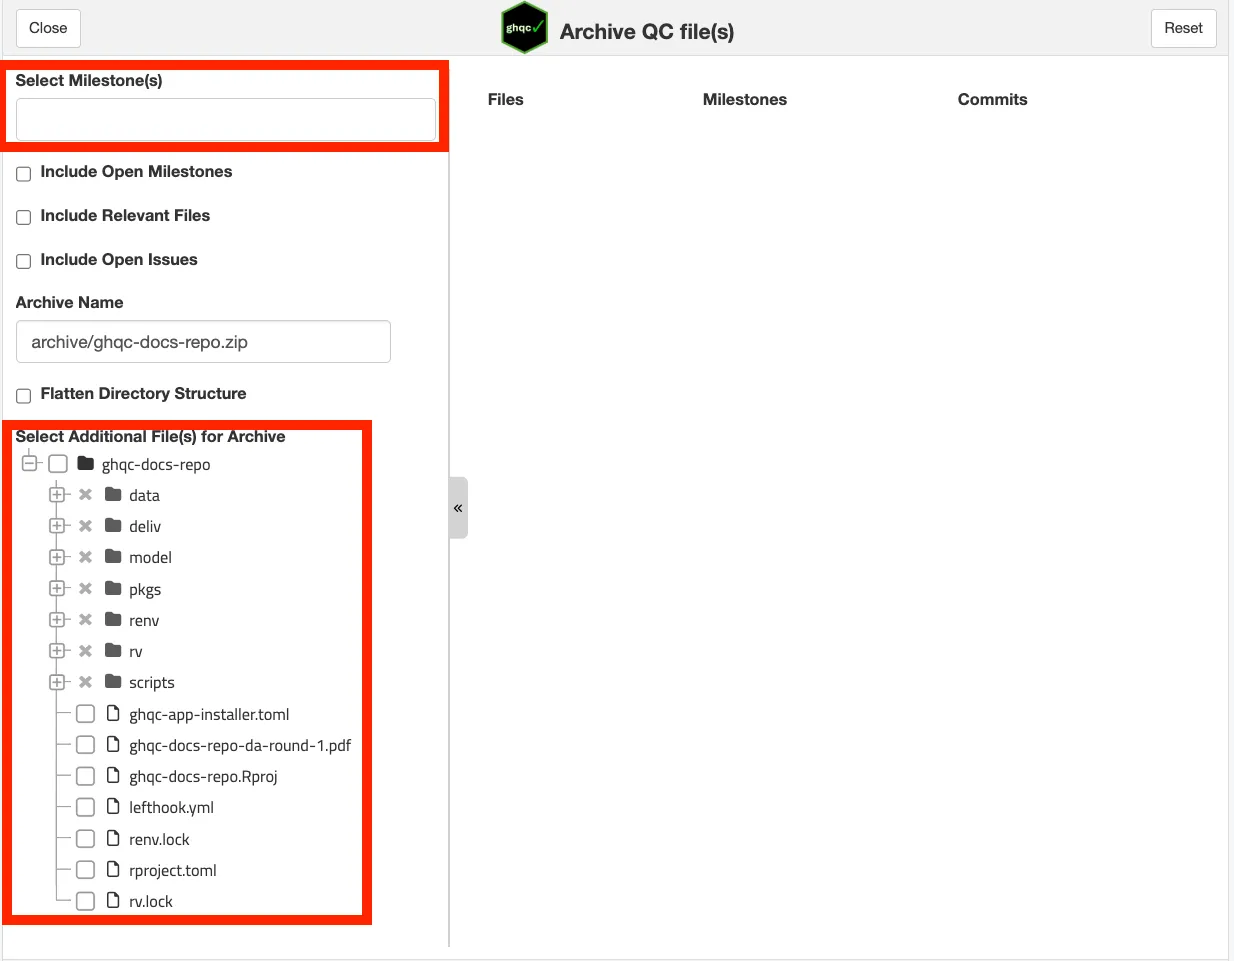
The app will launch in your viewer panel. The left pane is for selecting milestones and individual files to archive, while the right pane shows what’s in the archive and allows you to modify individual file selections.
2. Selecting Files to Archive
Section titled “2. Selecting Files to Archive”There are two ways to archive files:
- Using the milestone selector - Select milestones along with configuration options to determine which files to include
- Selecting files directly - Choose files directly from the file tree
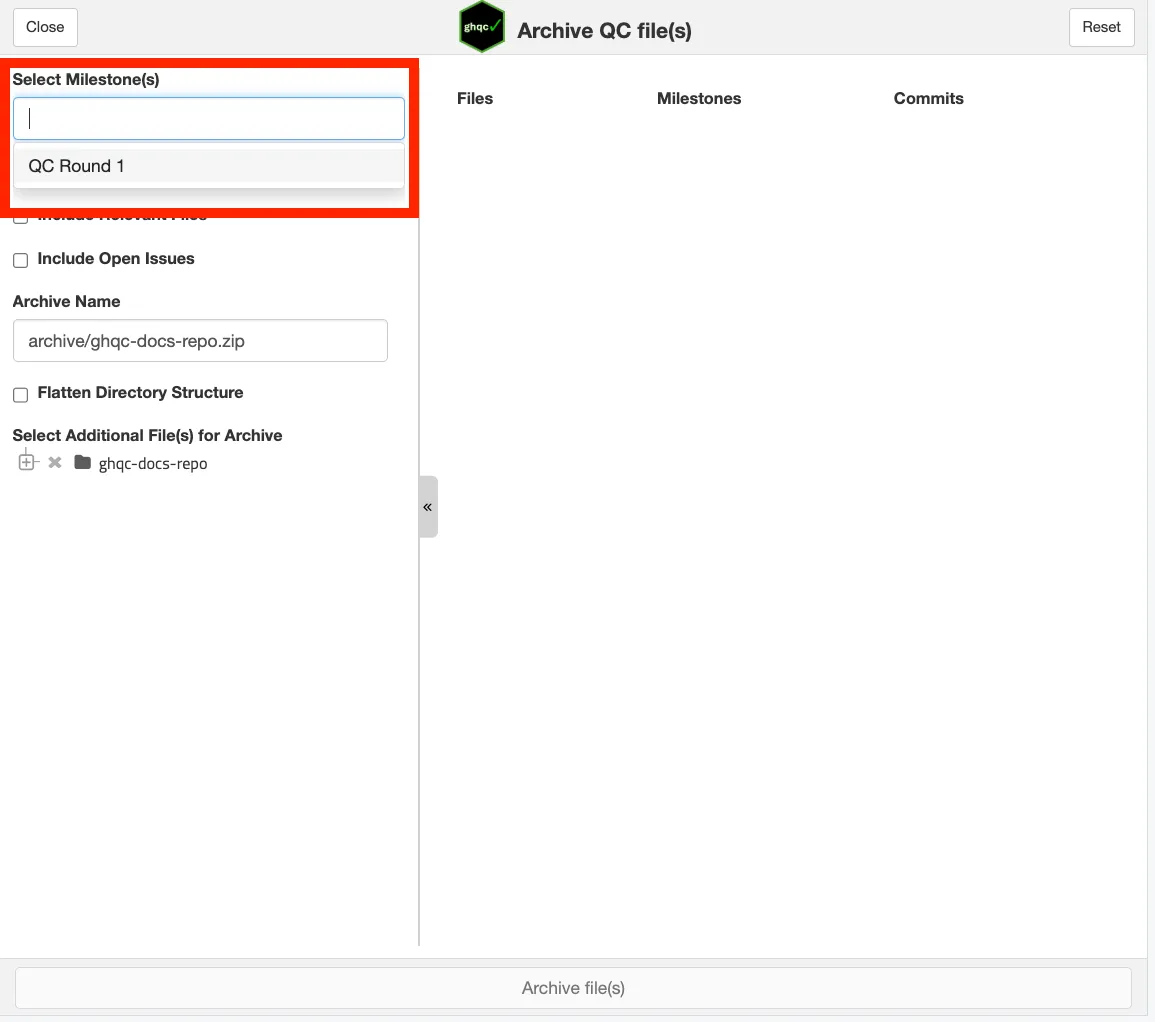
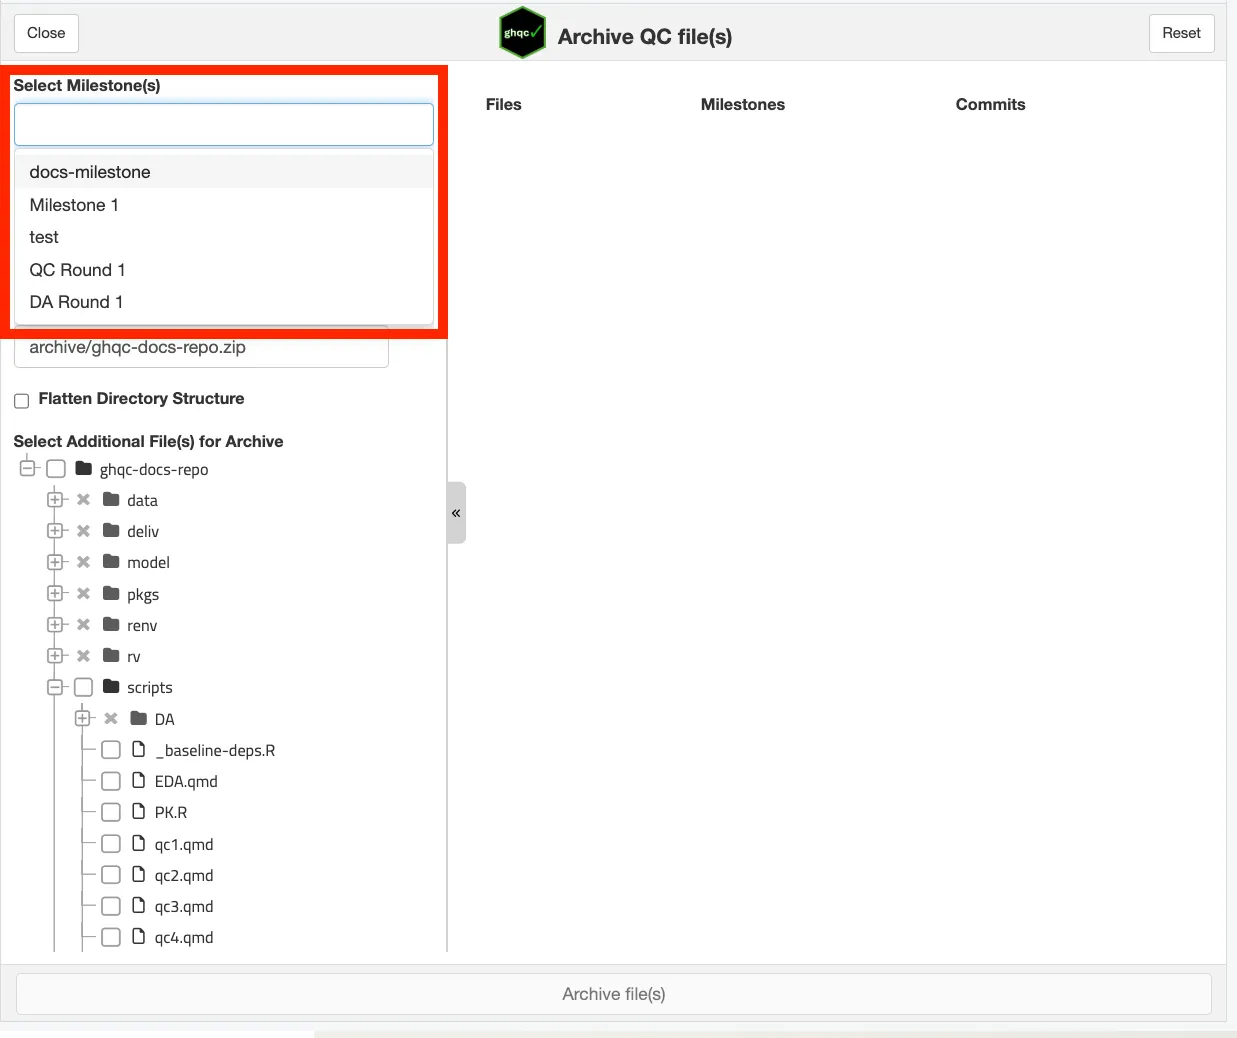
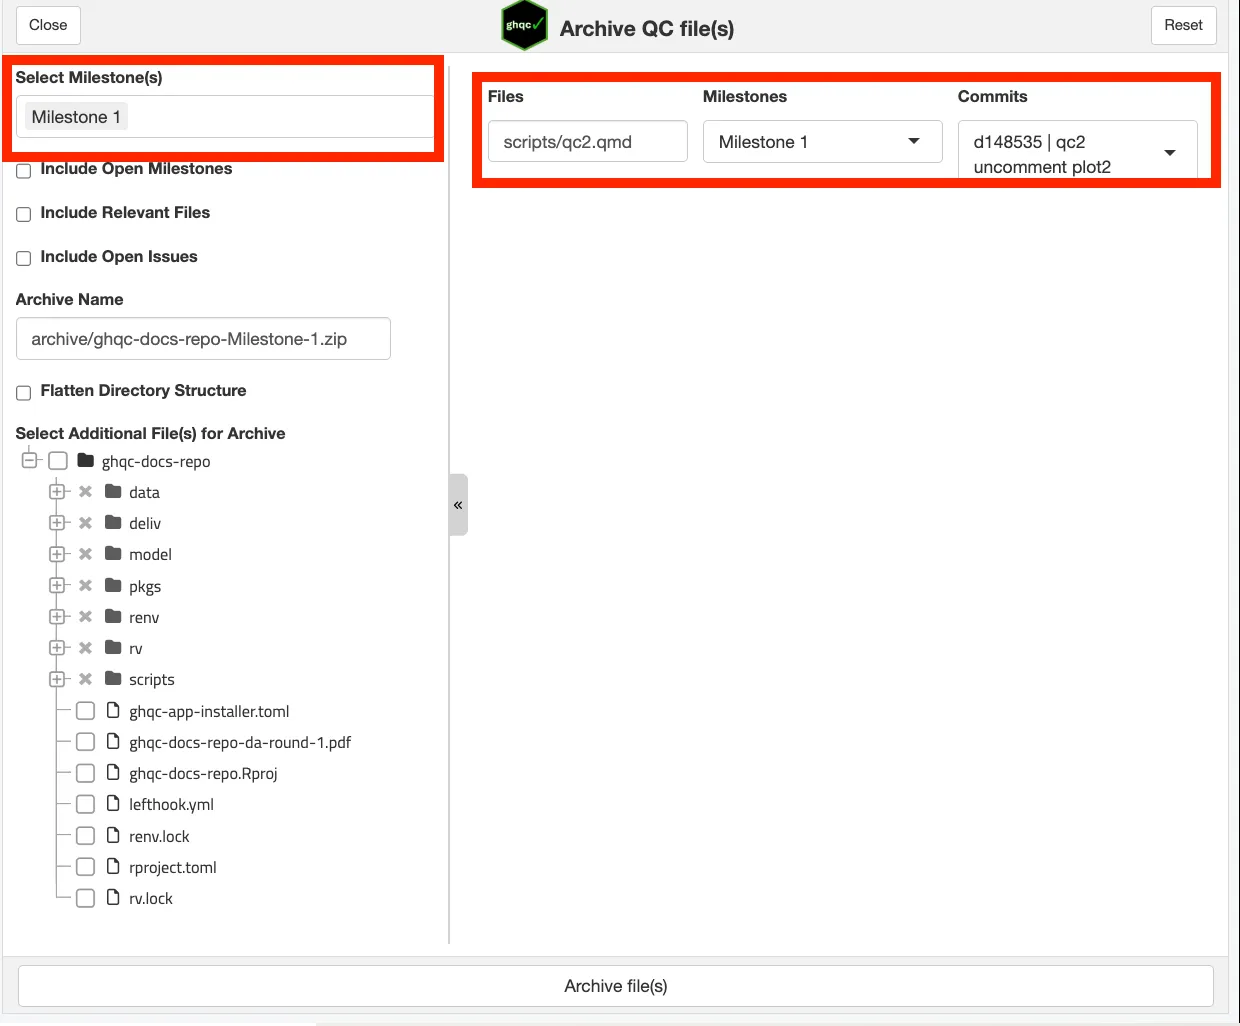
First, click on the “Select Milestone(s)” dropdown. This defaults to showing only closed milestones.
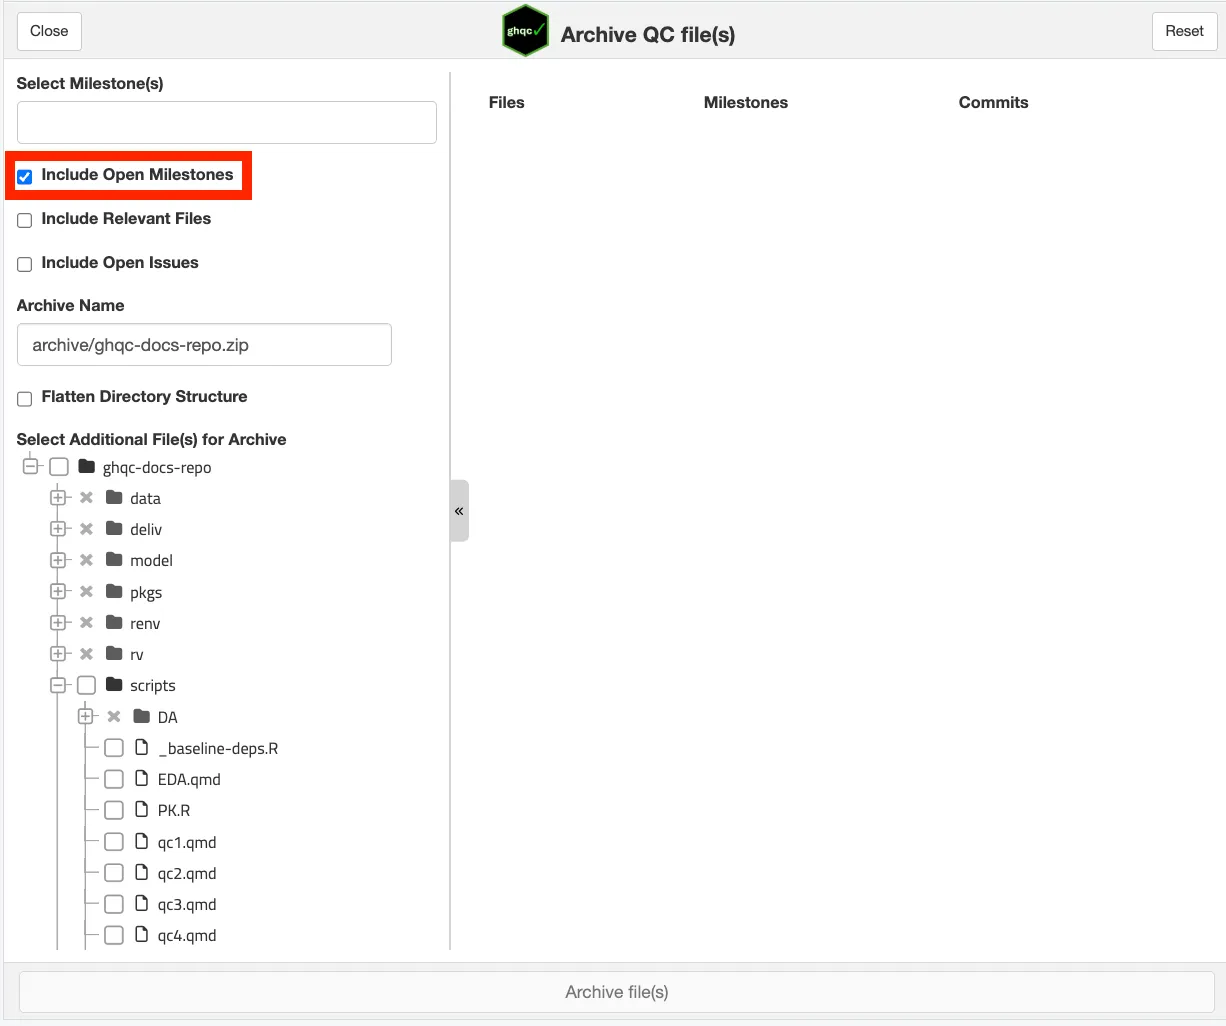
To select a milestone that hasn’t been closed yet, click “Include Open Milestones”.
Select the milestone you wish to archive. By default, selecting a milestone includes all closed issues from that milestone and their approved commits.
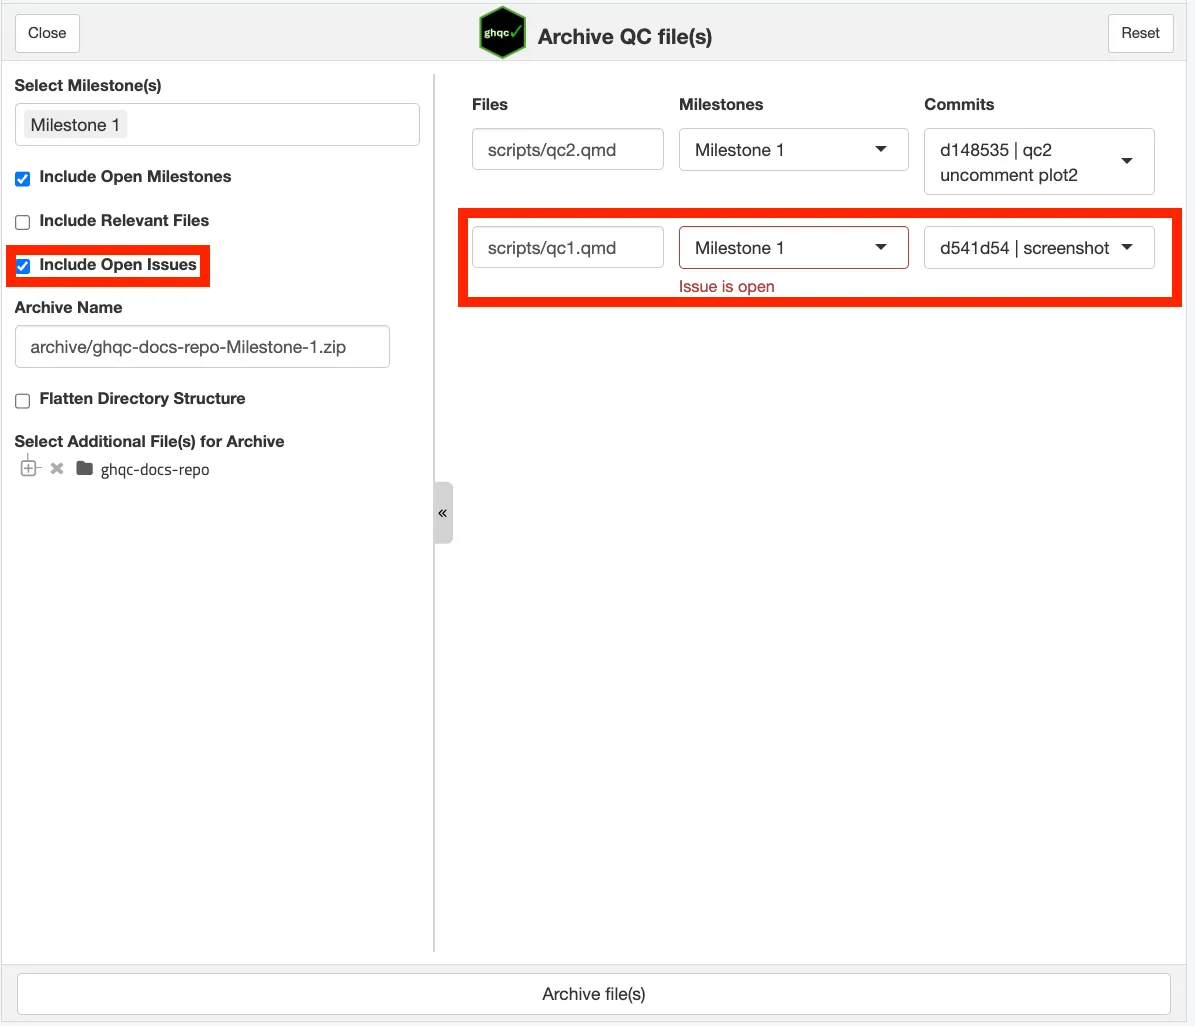
To include open issues in the archive, select the “Include Open Issues” checkbox. This will populate the archive with open issues from your selected milestone(s). Open issues display a message saying “Issue is Open”.
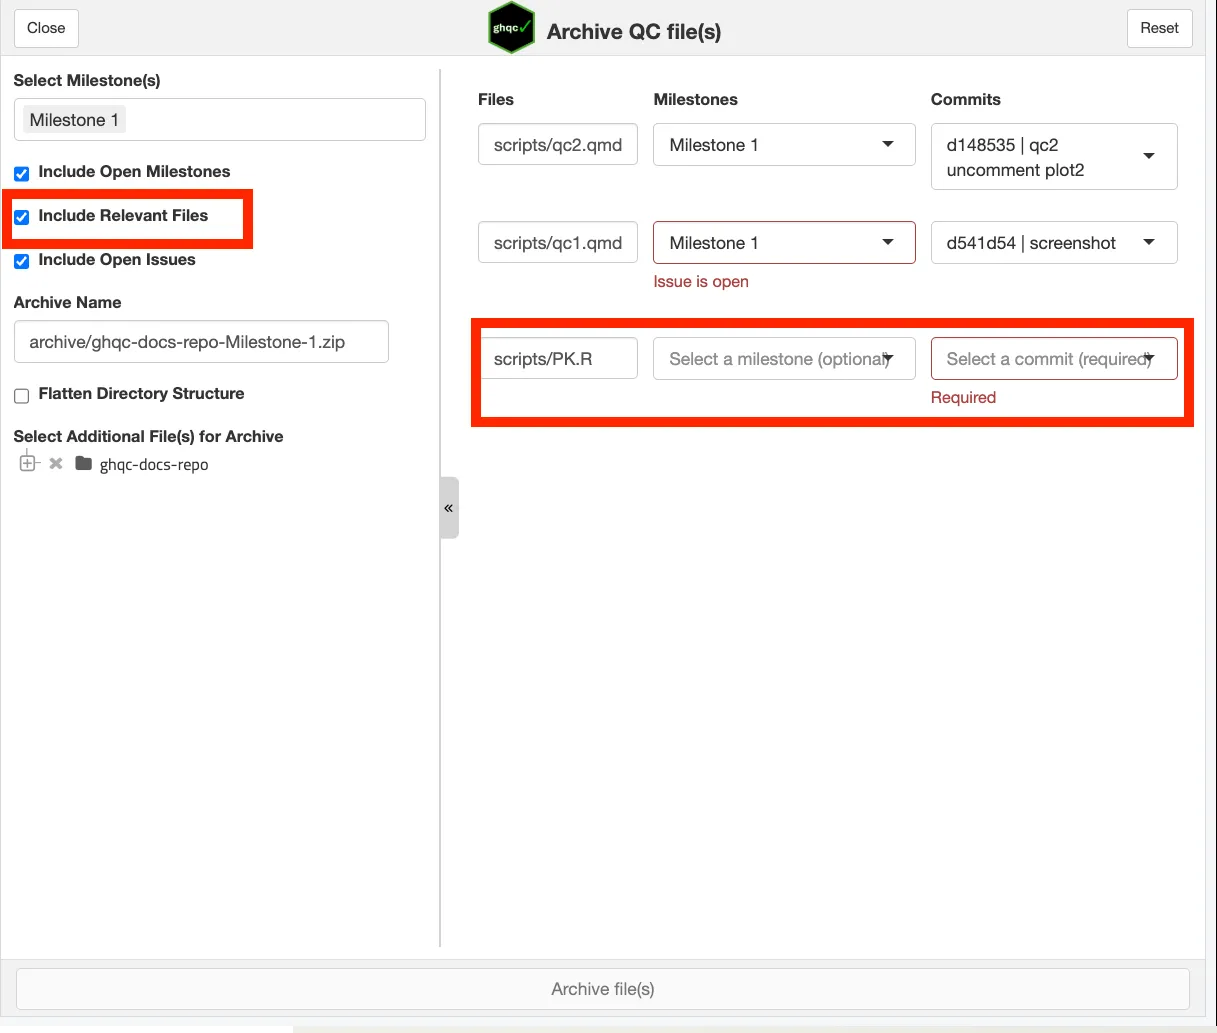
Since we have a relevant file associated with scripts/qc1.qmd, let’s archive that too. Click “Include Relevant Files” to populate relevant files associated with issues in the selected milestones. In the right pane, “Milestones” and “Commits” will default to blank with a “Required” message under commit. This allows free choice of commit and milestone for files that aren’t issues in selected milestones.
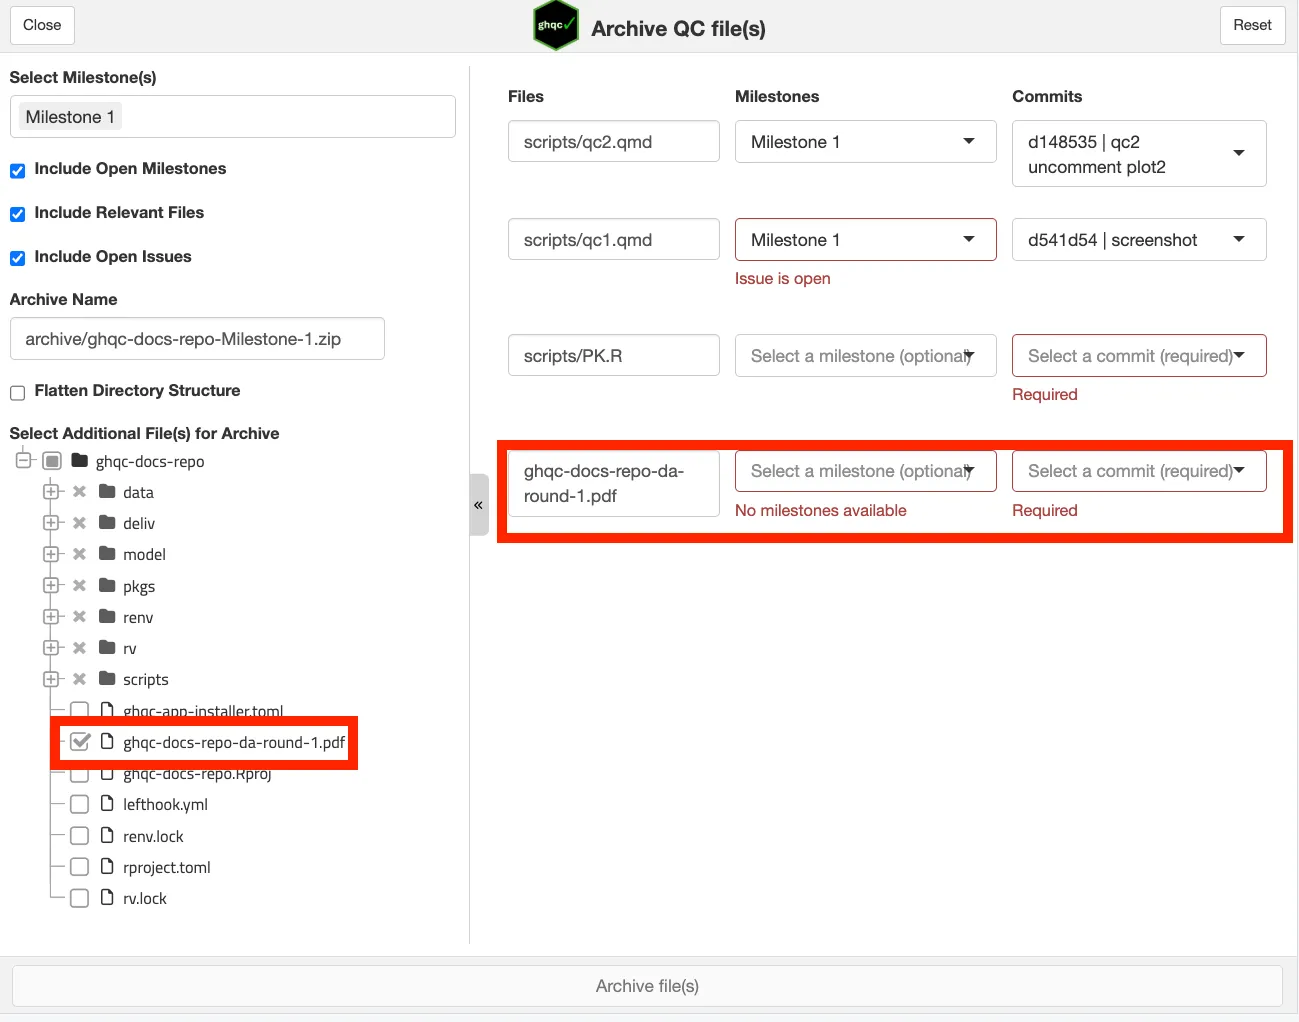
Now that we have all issues and relevant files from the milestone, let’s select the QC report from the file tree to include it in the archive. Since this file isn’t associated with an issue in a milestone, it will display a message saying “No milestone available”.
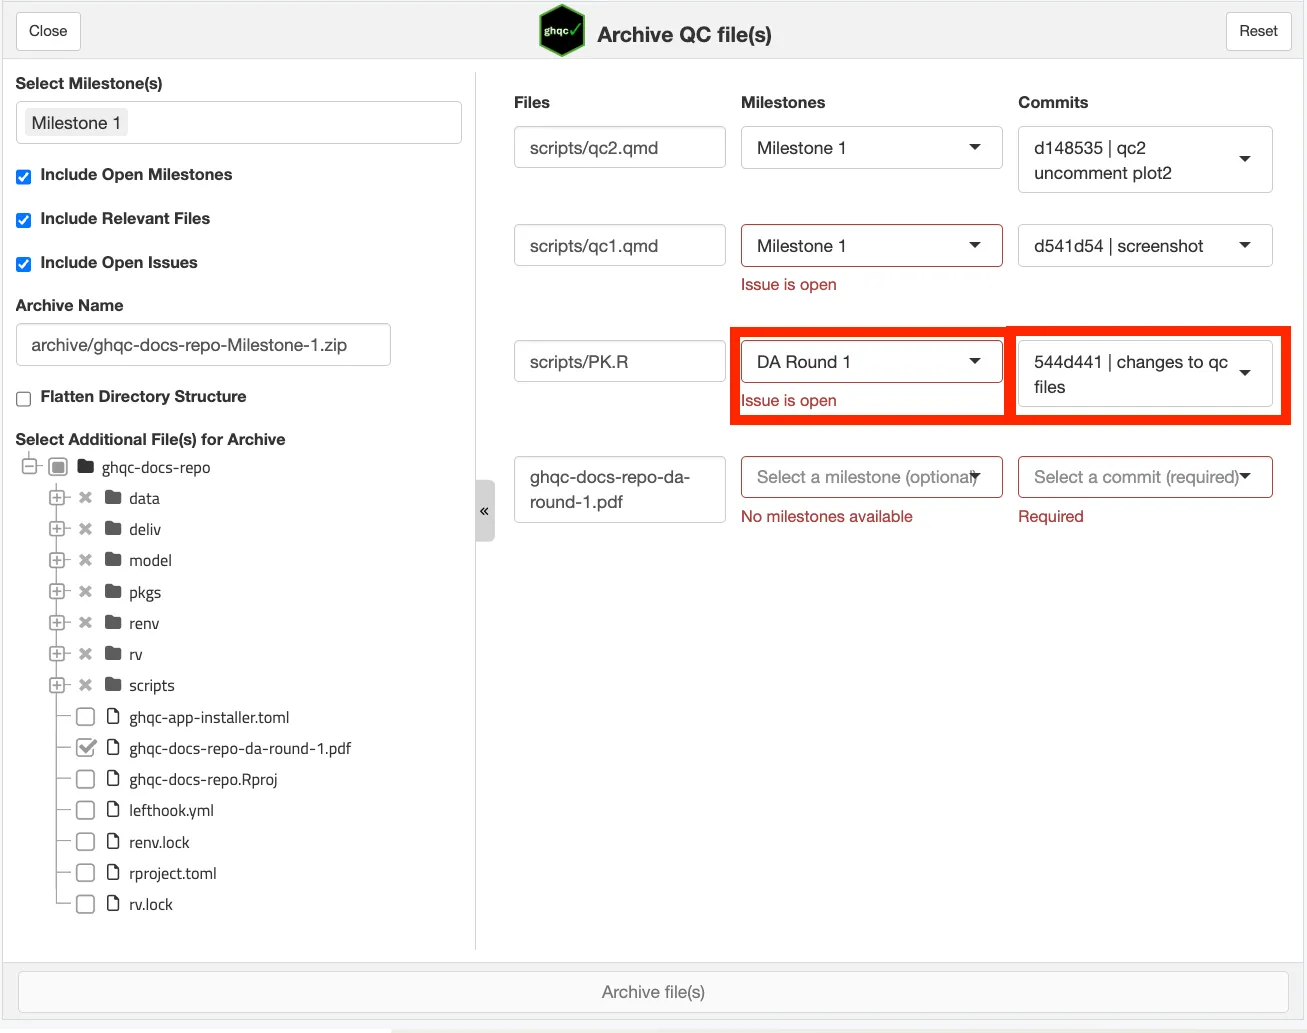
We have all the files we want in the archive, but before we can archive, we need to ensure all files have commits. For our relevant file in the right pane, click on the “Select a milestone (optional)” dropdown and select a milestone (if available).
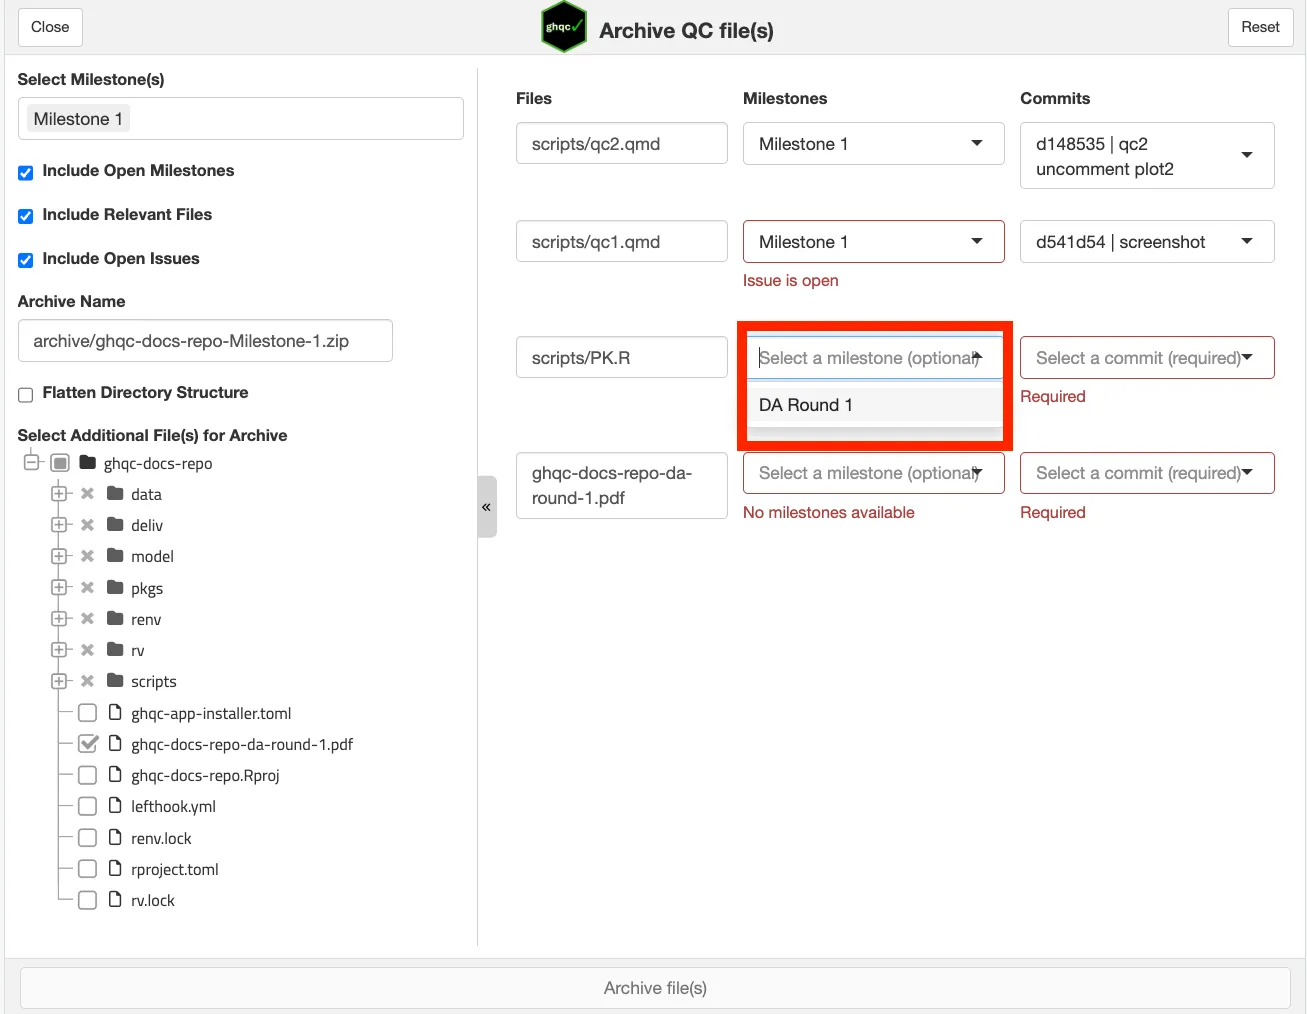
This selection will automatically select a commit in the Commits dropdown. It will default to the approved QC commit for that file’s issue in the selected milestone, or the most recent commit if that issue is still open.
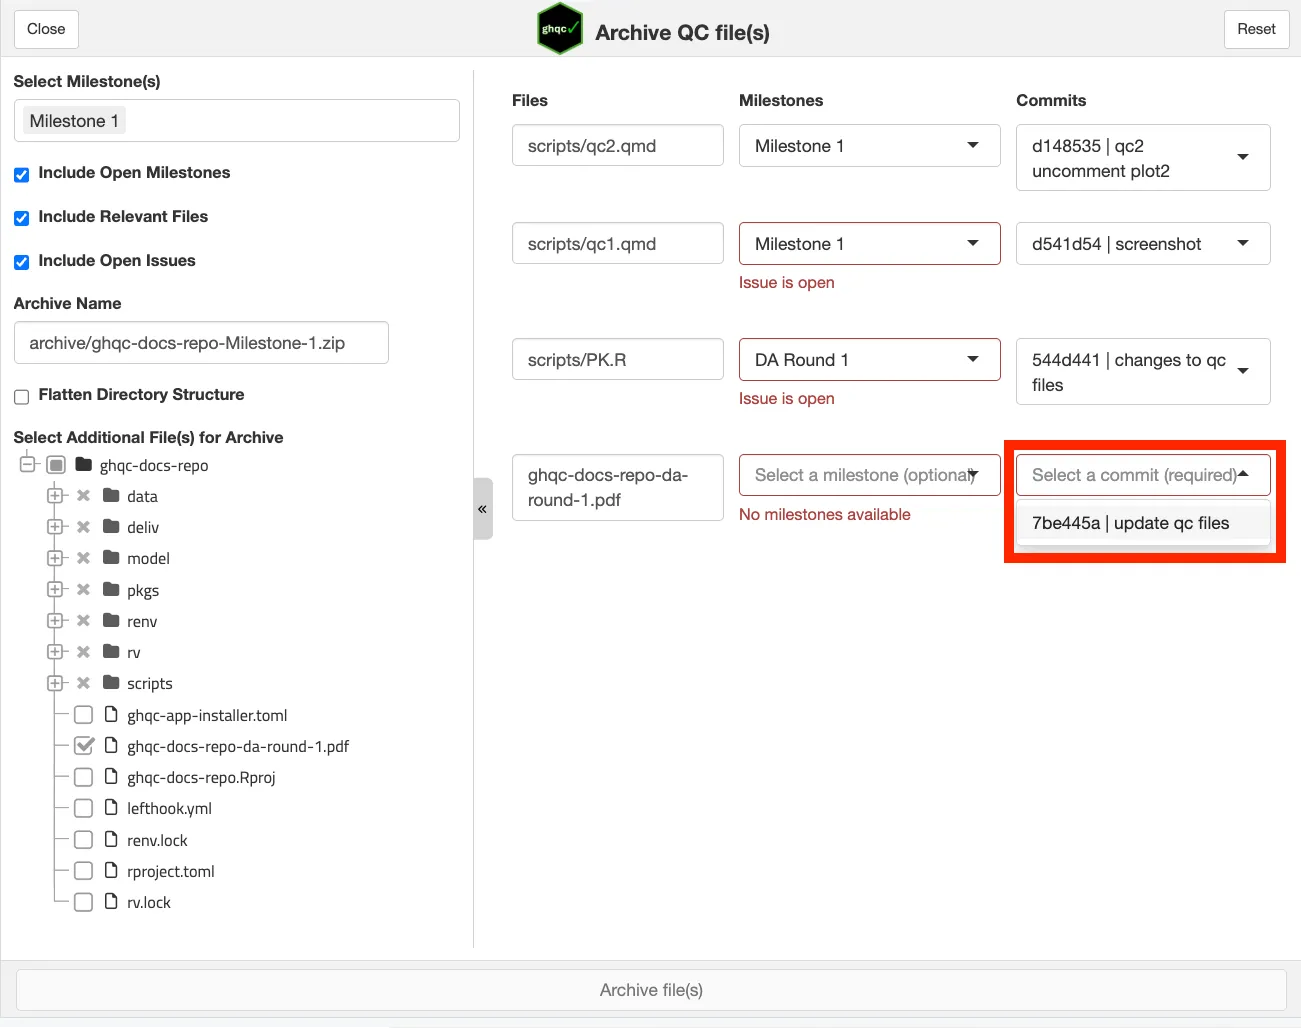
However, you don’t need to select a milestone in the right pane for every file; you can select a commit that isn’t associated with any milestone instead. For the report, let’s select a commit from the “Commits” dropdown.
3. Generating The Archive
Section titled “3. Generating The Archive”Now that we have selected all the commits for our files, we can generate the archive.
By default, the archive structure mirrors the working directory’s structure. Click the “Flatten Directory Structure” checkbox to remove the normal file directory structure.
For example: scripts/qc1.qmd becomes qc1.qmd in the archive.
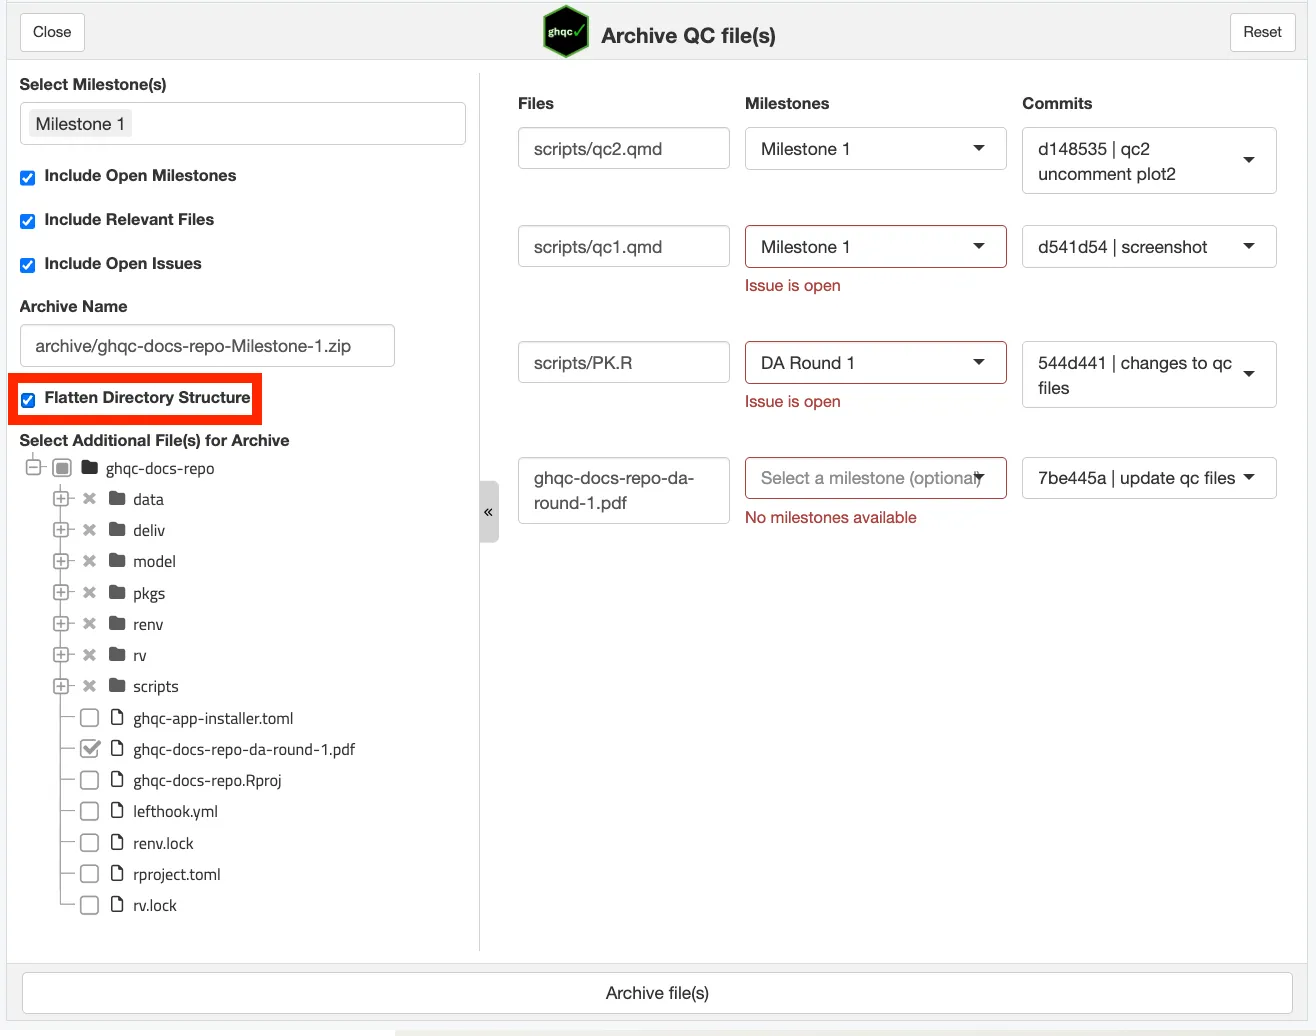
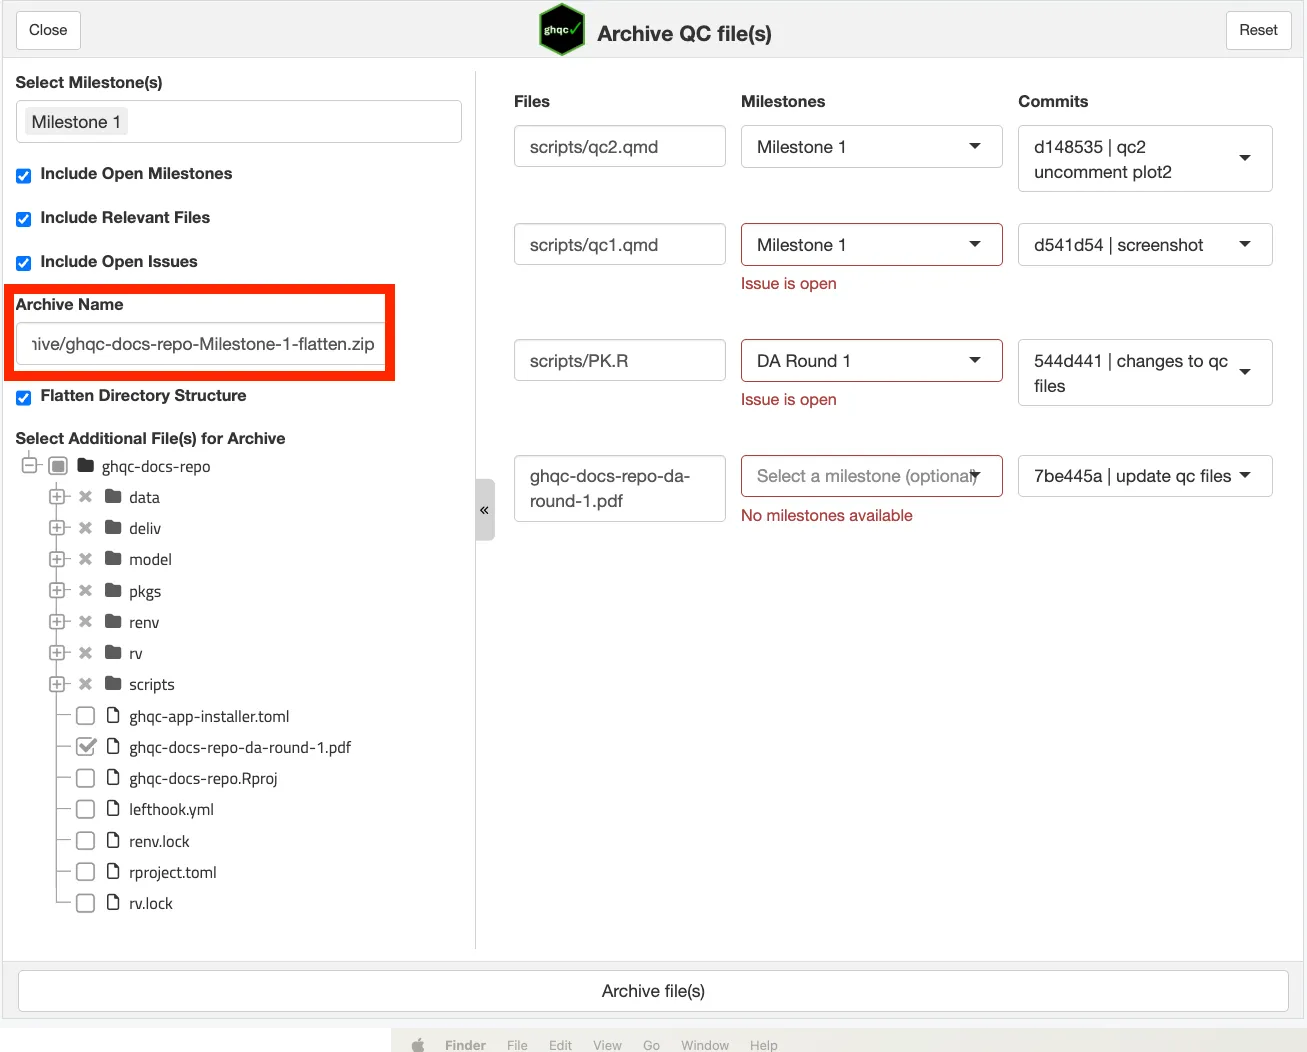
To make it clear that we flattened this archive’s file structure, let’s edit the “Archive Name” box to add “-flatten” before the “.zip”. You can change the directory the archive goes into and the name of your archive by editing this box.
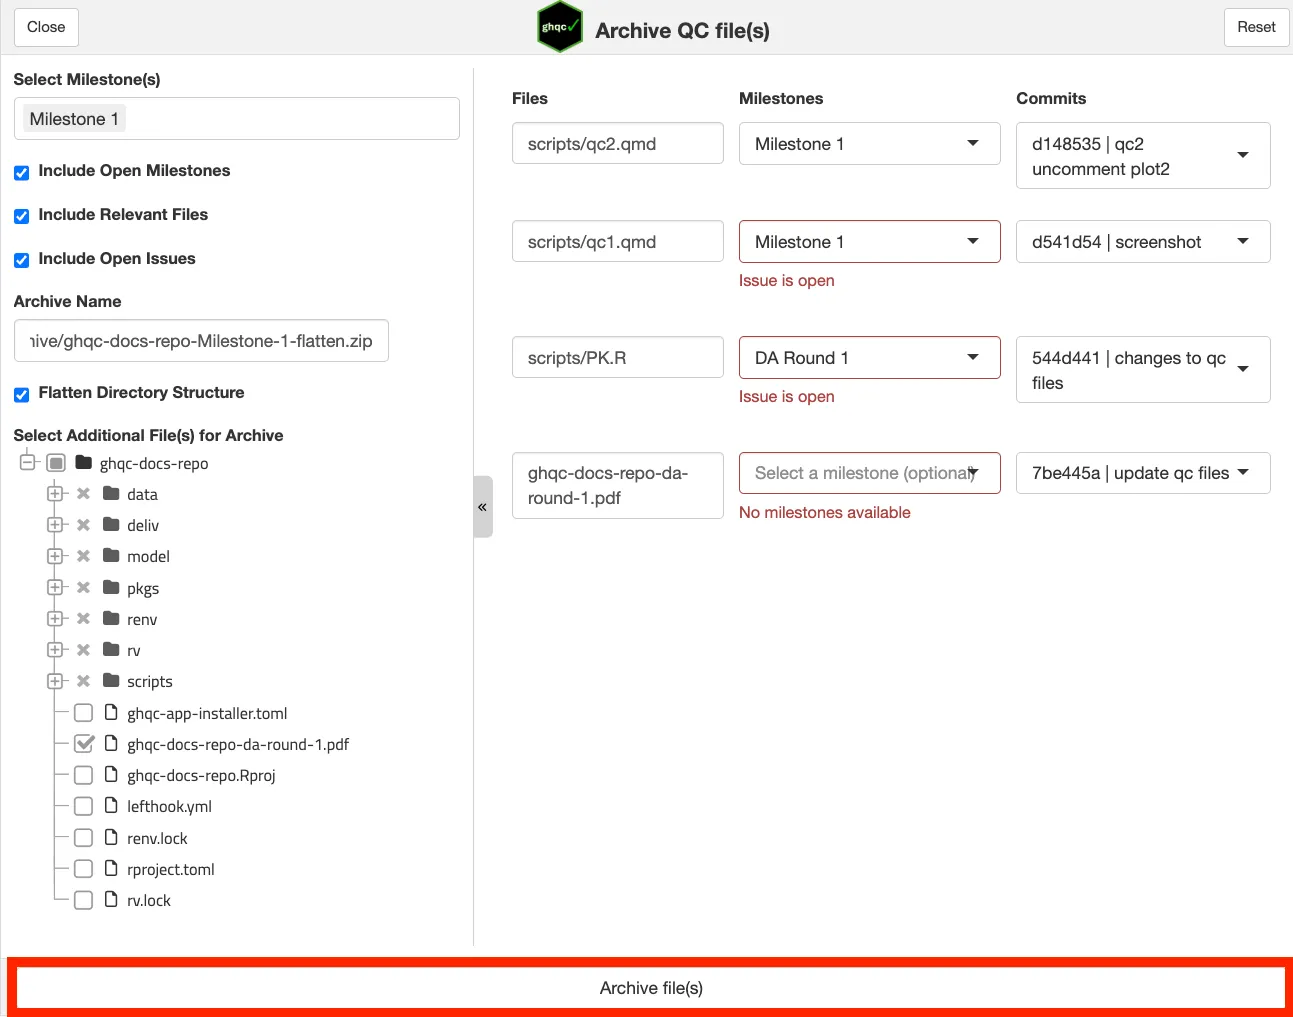
Now click the “Archive file(s)” button to archive the selected files.
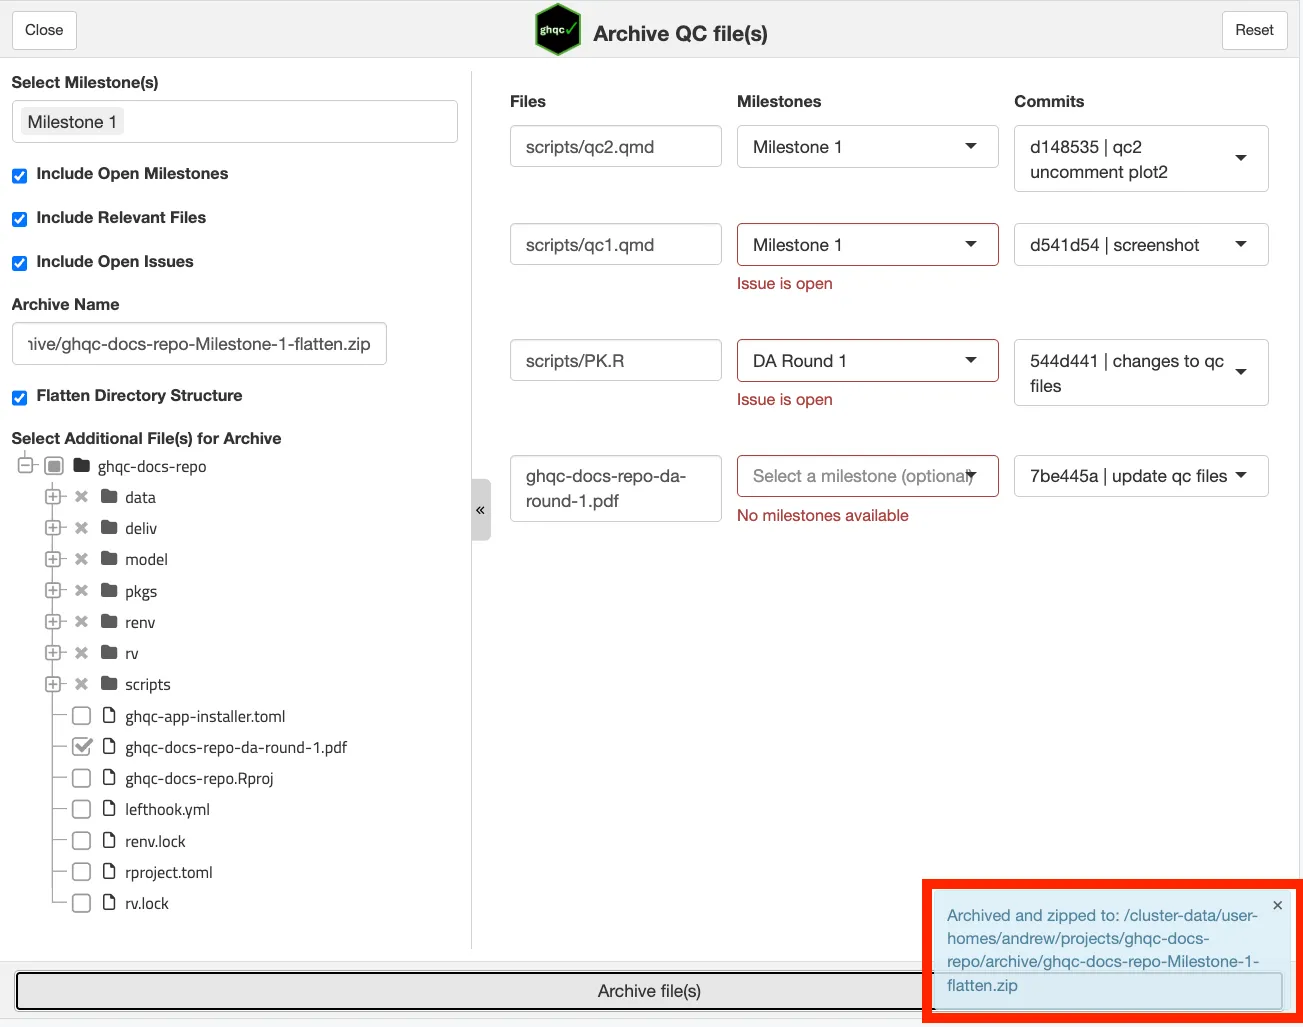
You will know your files have been successfully archived when a message appears in the bottom right corner confirming the archive has been created.
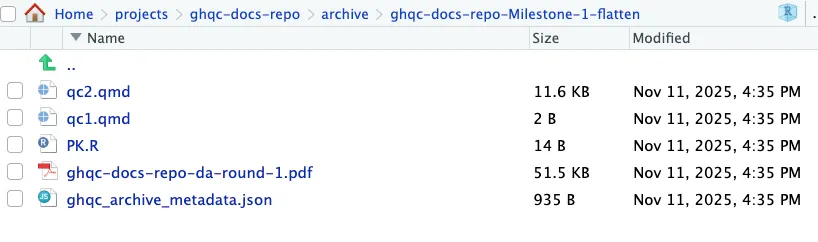
4. In The Archive
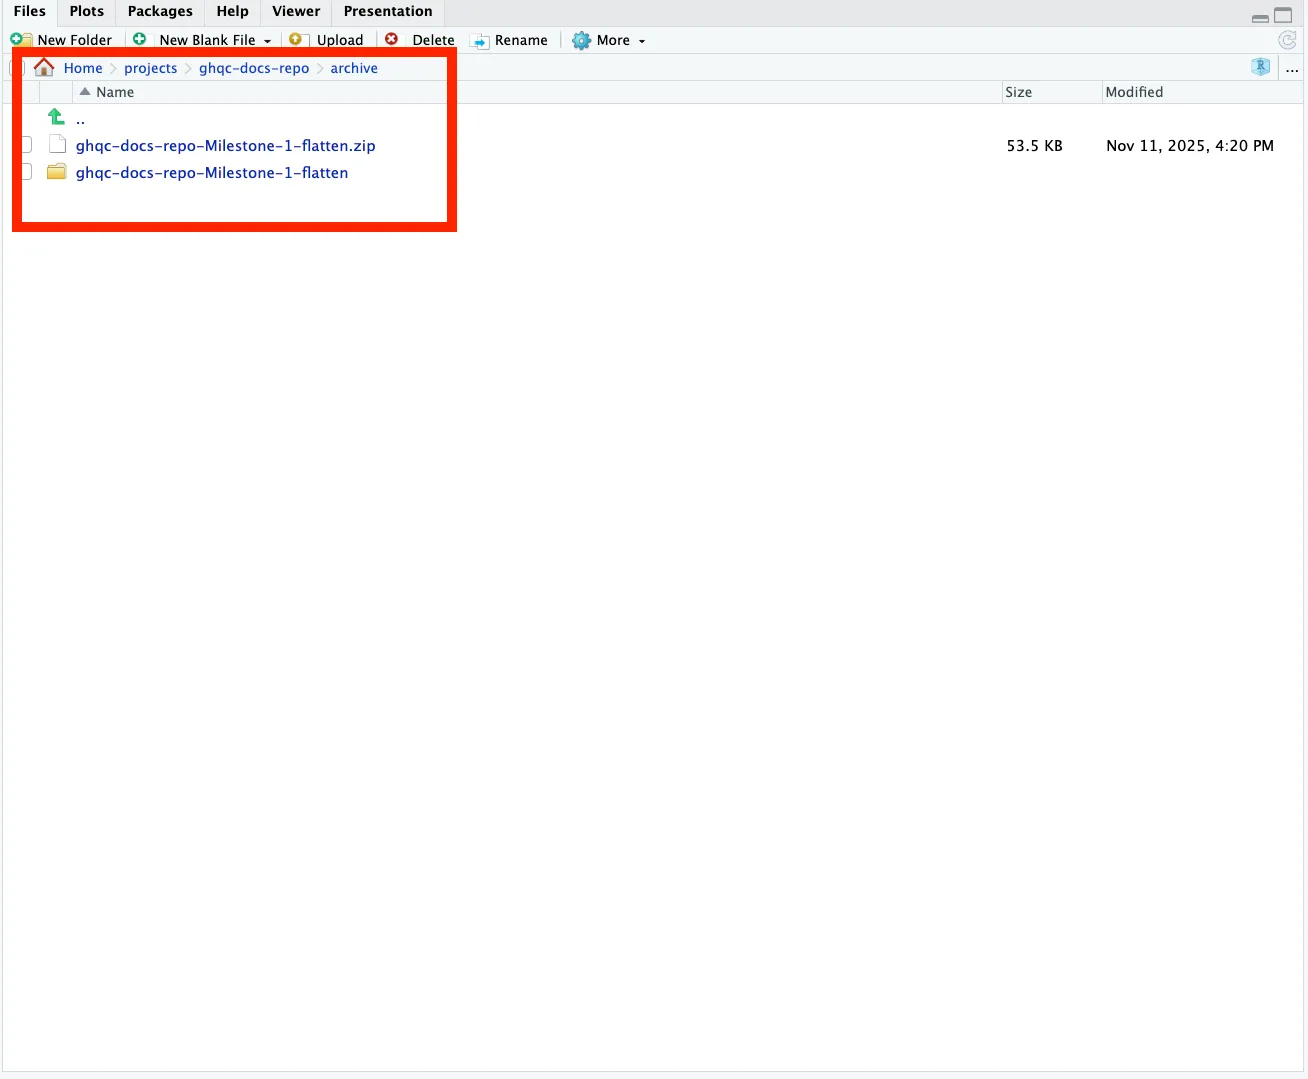
Section titled “4. In The Archive”The archive has been created as a zip file and placed in the specified directory. To view the archive, let’s unzip it. In the R console, enter:
unzip("path/to/archive", exdir = "archive")This is what your archive should look like now: the zip file and the unzipped version of the archive.
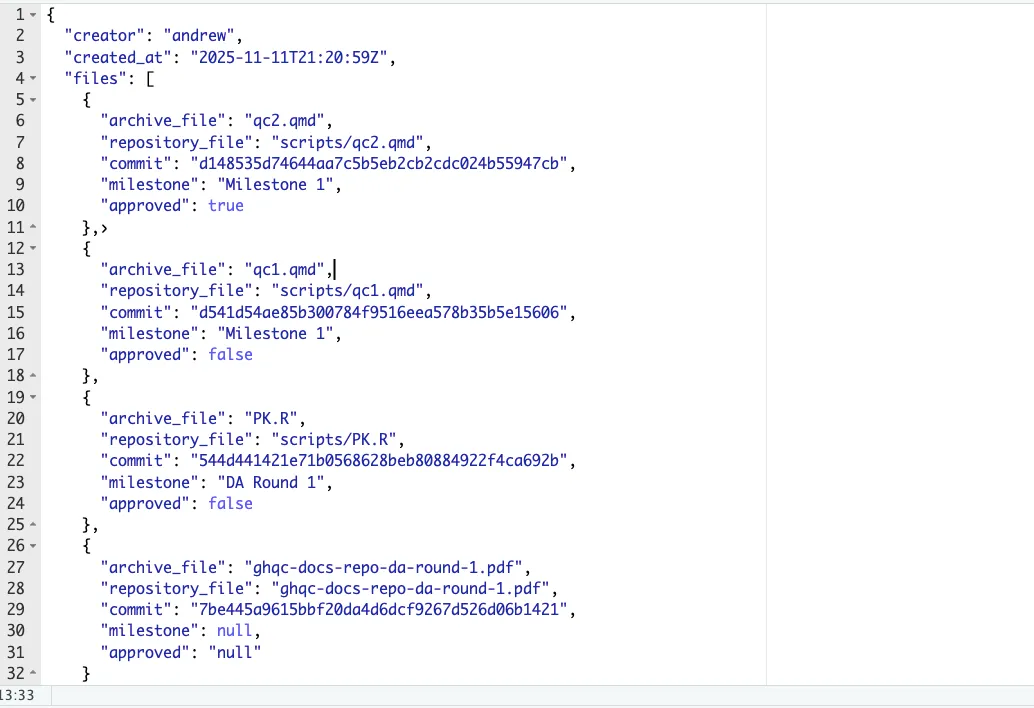
The archive will include all the files you selected to archive, plus a metadata JSON file. This metadata file contains the creator of the archive, the time it was created, and a list of files in the archive with their archive path, repository path, selected commit, and issue QC approval status.